Coming Soon
Home > Forum


Author Topic: 1979 Honda CR250R Resto Engine  (Read 5814 times)

0 Members and 1 Guest are viewing this topic.

Offline dogger315

  • Expert
  • ****
  • Posts: 113
    • View Profile
1979 Honda CR250R Resto Engine
« on: August 19, 2012, 11:10:56 PM »
Here is a series of post detailing the restoration of a 1979 Honda CR250R "Red Rocket" I did
a few years ago.  I always photographically document my restorations for the build books I
provide customers, or in this case, keep for myself.

Since quite a bit went into this process, I'll break it down into multiple installments.  Comments
and suggestions are always welcome - I'm always on the look out for new ideas and methods.
You're going to see a lot Red in these posts, so all the Honda haters might want to avoid them.

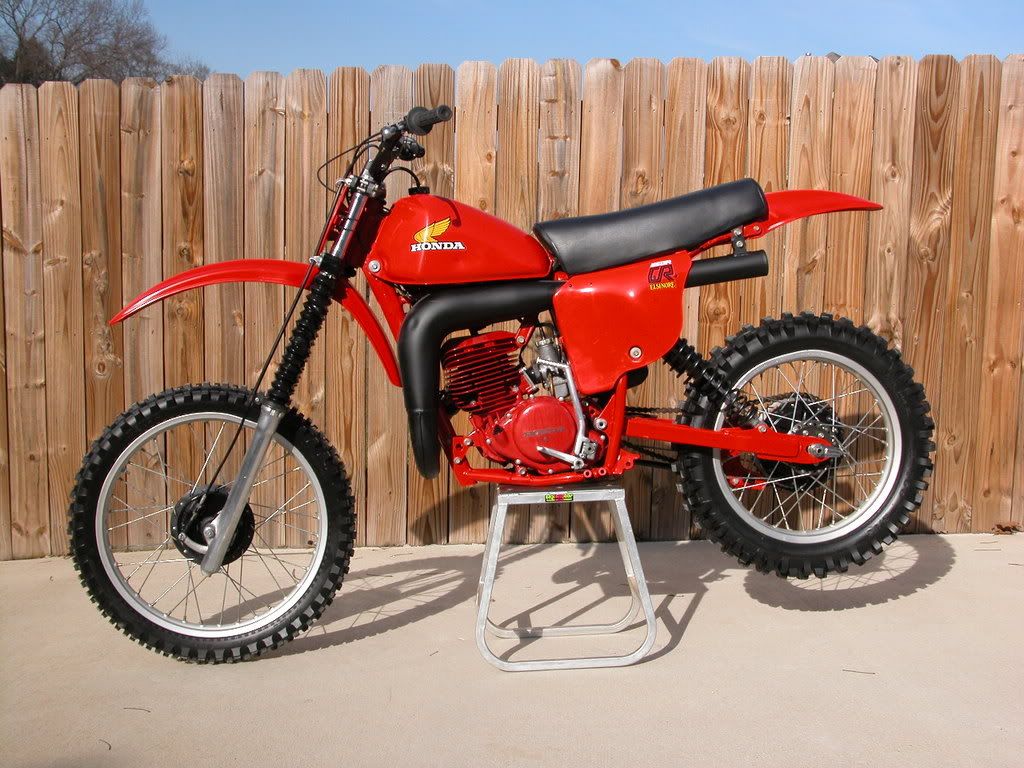
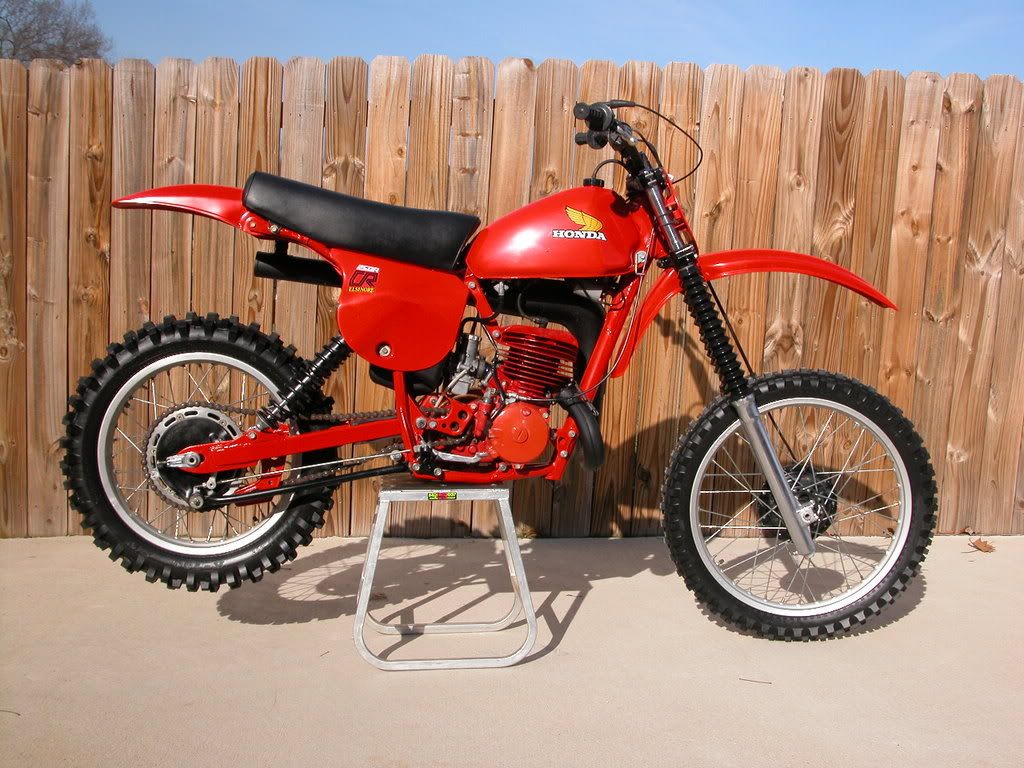
Here are a couple of pictures of the bike right after I unloaded it from the truck.  I bought it from
an EBay auction.  The bike was 95% complete and looked OK from about 30 feet.  Once you got
closer, things started going downhill.  The bike had been subjected to what I like to call a "get it
ready to sell" restoration.  New off brand tires, rattle can paint, lots of Armorall on the plastic and
rubber, etc.  Still, a reasonably nice find and a great basis for a full on restoration.


I made the decision that this bike would be 100% OE Honda, no reproduction or aftermarket parts.
I knew that would make the resto very difficult, but well worth it if I could pull it off.  I disassembled
the bike and divied everything into groups - engine, frame, suspension, wheels, etc.

First on the list was the engine.  After breaking it down, I was thriled to find that it's original chrome
cylinder bore was in outstanding shape and all I needed to do was a basic restoration to new condition.
A quick note here.  1979 Red Rockets were painted Tahitian Red, there was no powder coat match
for that color at the time.  I had to find a part that was hidden from the sun and elements to use for
a color match.  I found a powder coat company willing to produce a quantity of Tahitian Red powder
for me in gloss and satin.  I also commisioned a company to color match the glyptal paint used to
coat the inside of the Magnesium castings.

A lot of the Magnesium parts were corroded and pitted which is quite common so I used a TIG
and some special sheilding gas and a Magnesium rod to fill weld the pitted surfaces.  If this sounds
dangerous, it is, so don't try this at home.

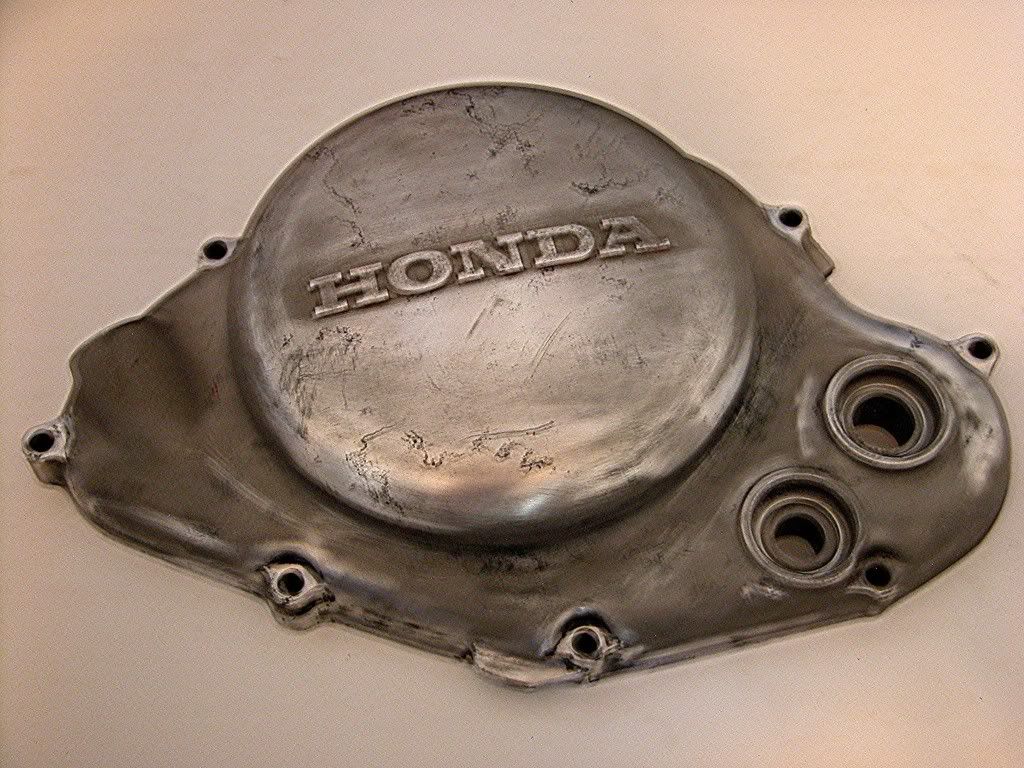
Right side case cover after media blasting and fill weld repairs

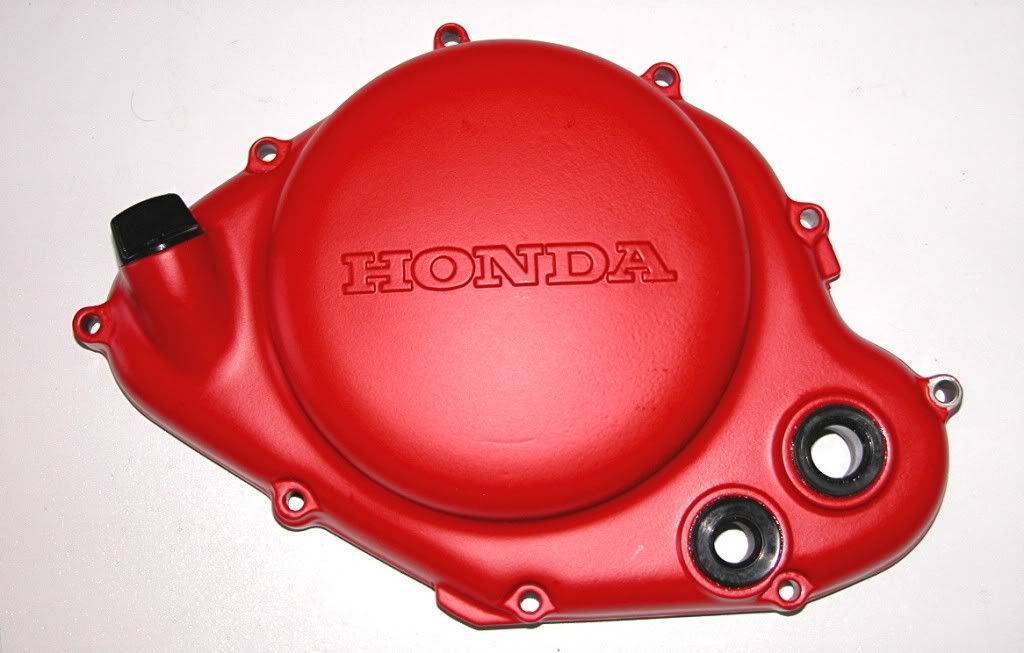
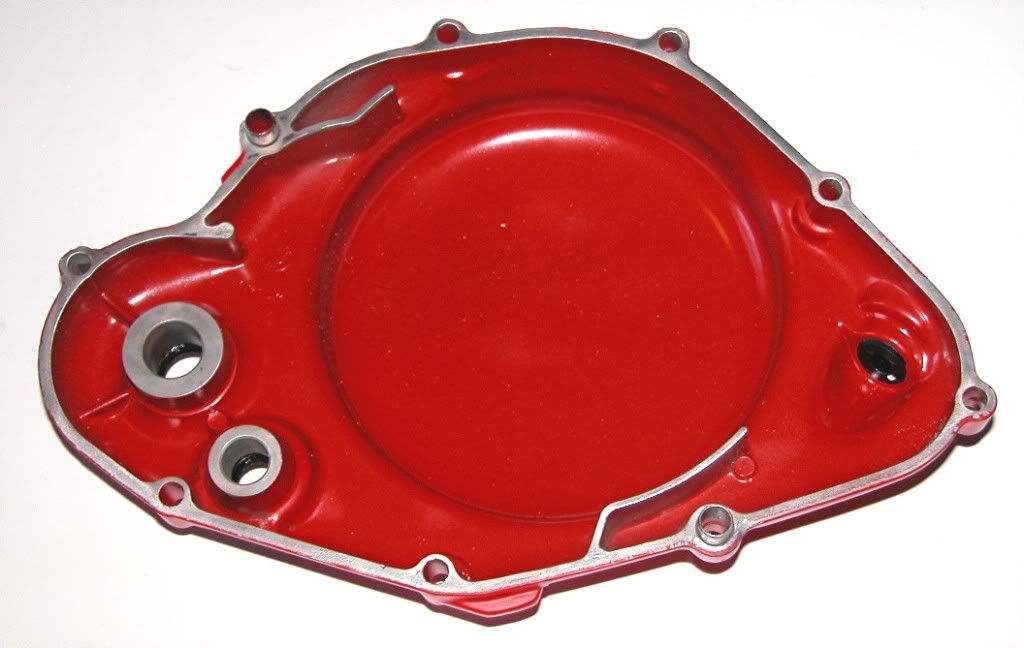
Finished Right side case cover.

Inside of Right side case cover with color matched Glyptal paint.

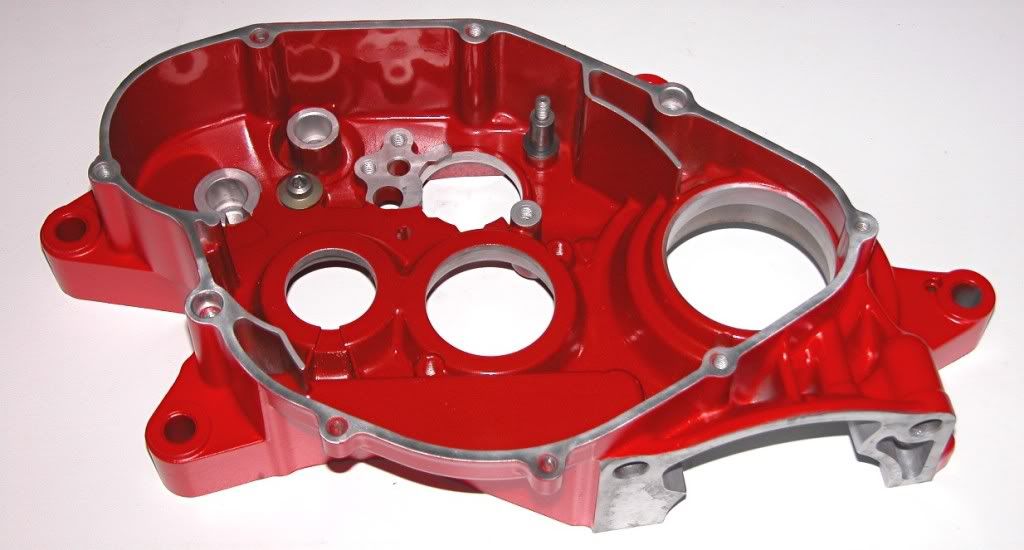
Finished Left side center case.

The transmission was treated to a NOS main and countershaft and all the gears were
NDIed and checked in tolerance.  Any part that failed these tests were replaced.  I also
replaced all of the thrust washers and circlips with new.  I sent the crankshaft and a new
Honda rod and big end bearing to Racers Toy Store for a rebuild and balance.  I also
replaced the shift forks, shafts and shift drum with NOS.  The bottom end was now as
good as it was the day it rolled out of the factory.

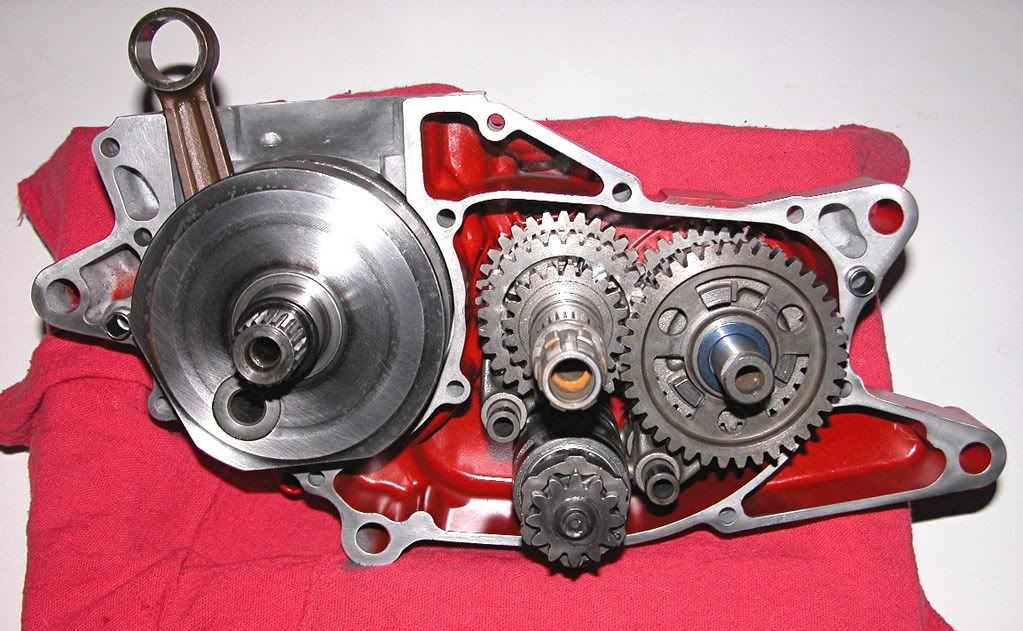
Loaded right side case.

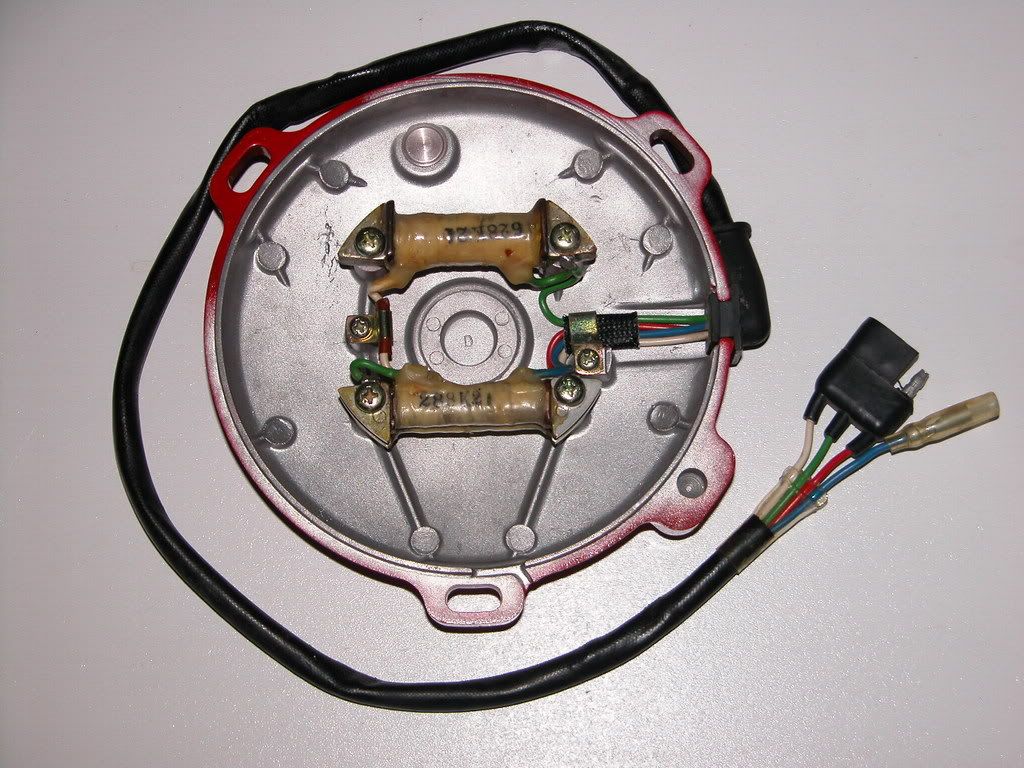
Next up was the ignition.  Honda had several different ignitions lettered from "A" to "E".
The "E" ignition was supposed to be the best.  This bike came with the "E" as seen
stamped on the tab at top Left.

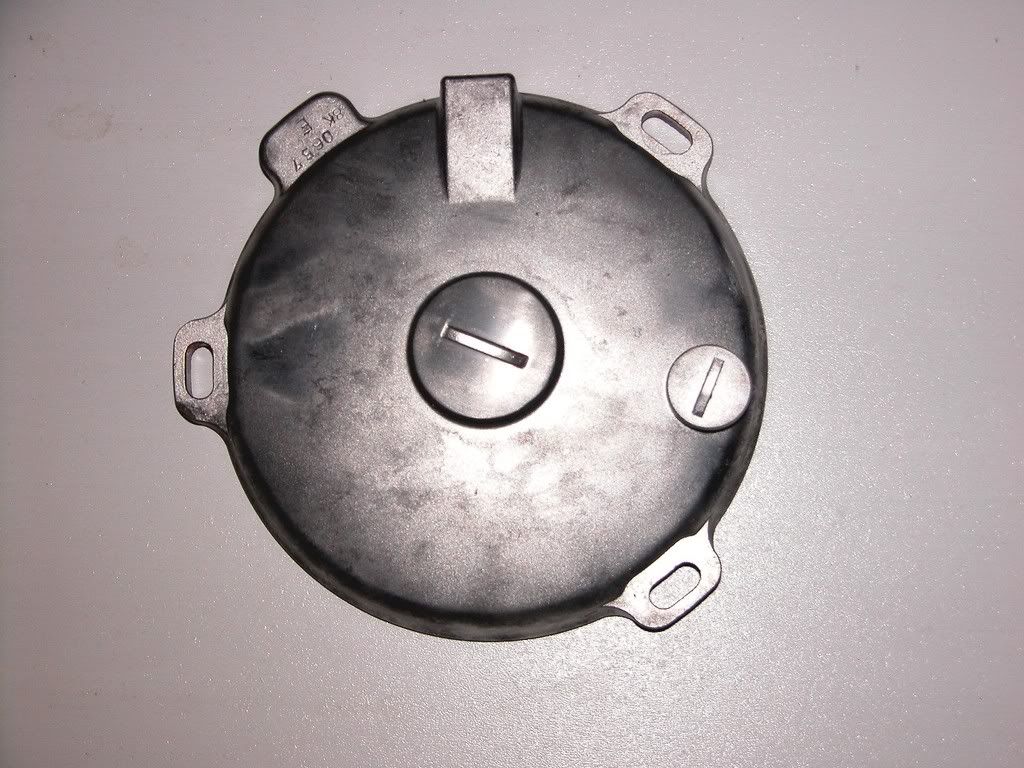
Ignition cover with magnets removed (also not recomended) and media blasted

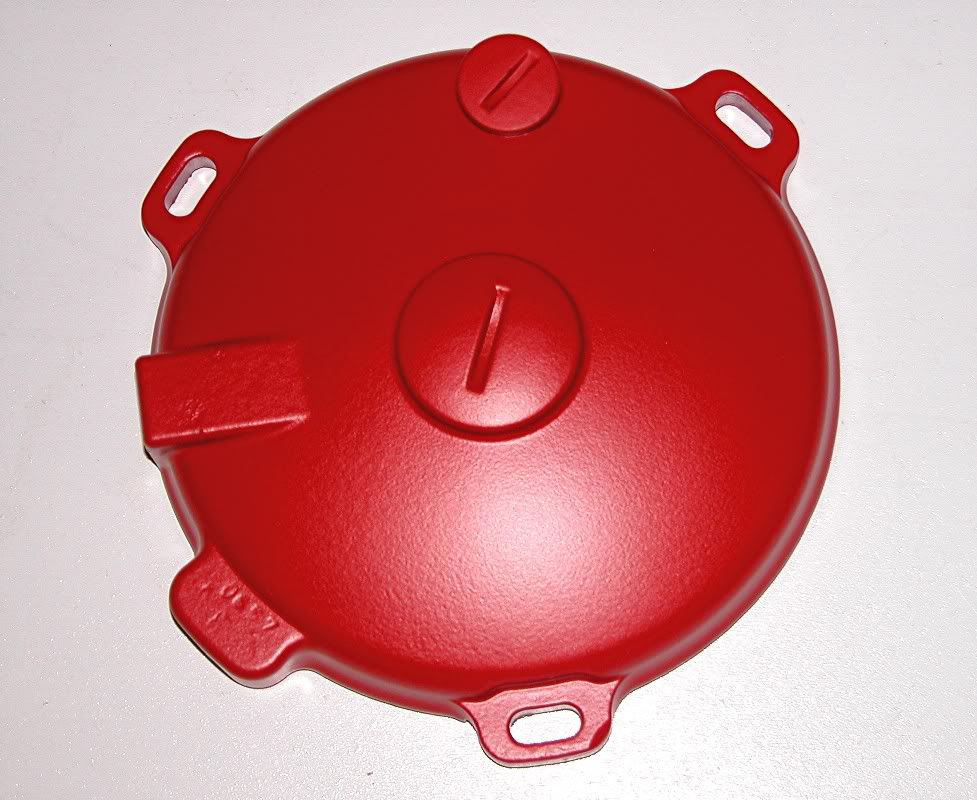
Ignition cover after powder coat.

Ignition cover with magnets installed and alligned.

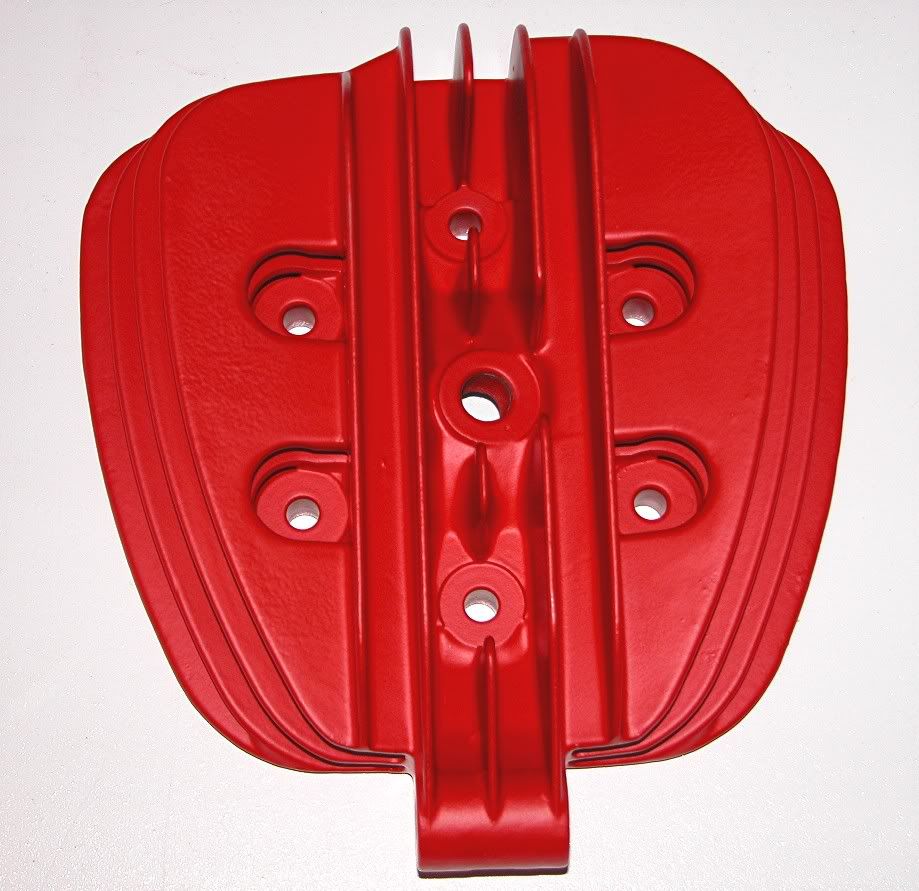
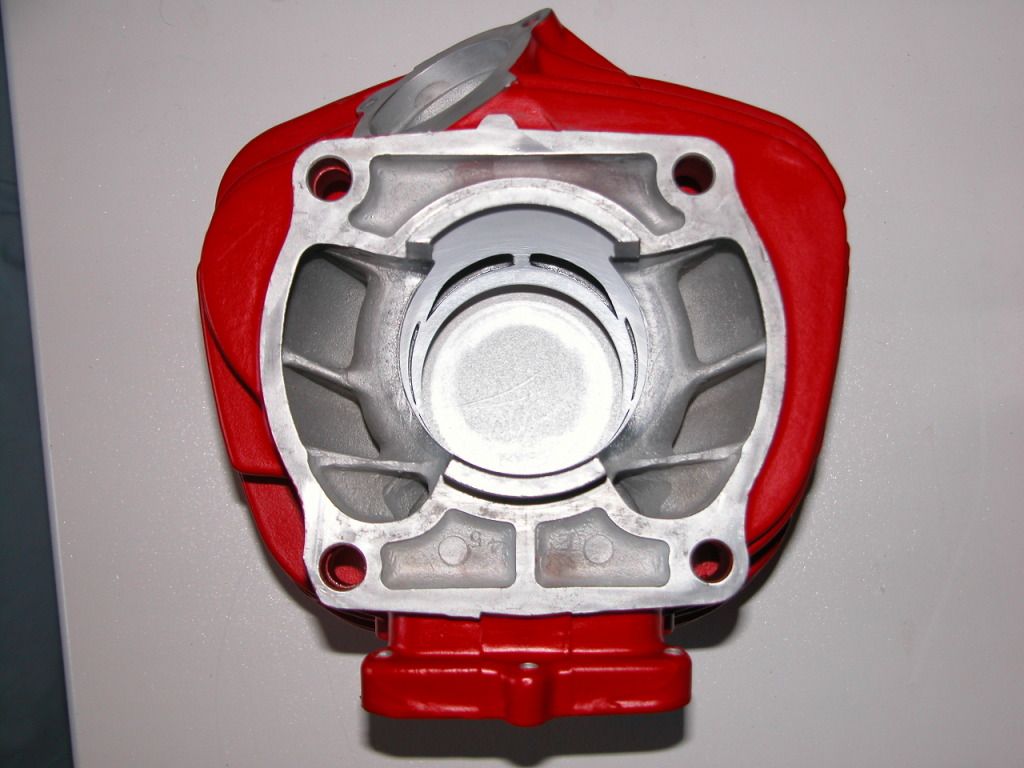
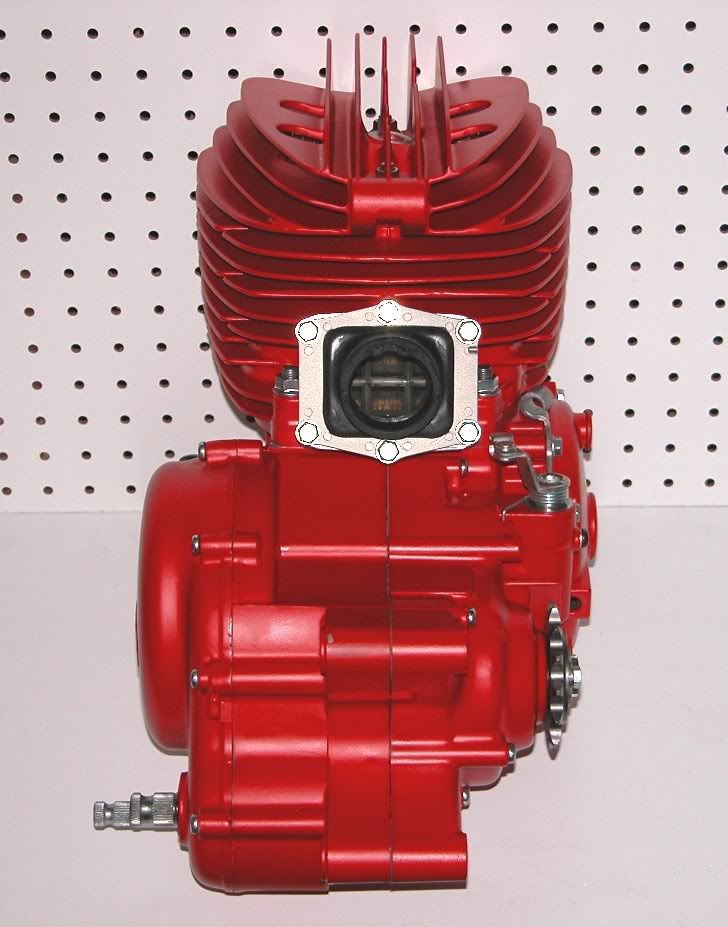
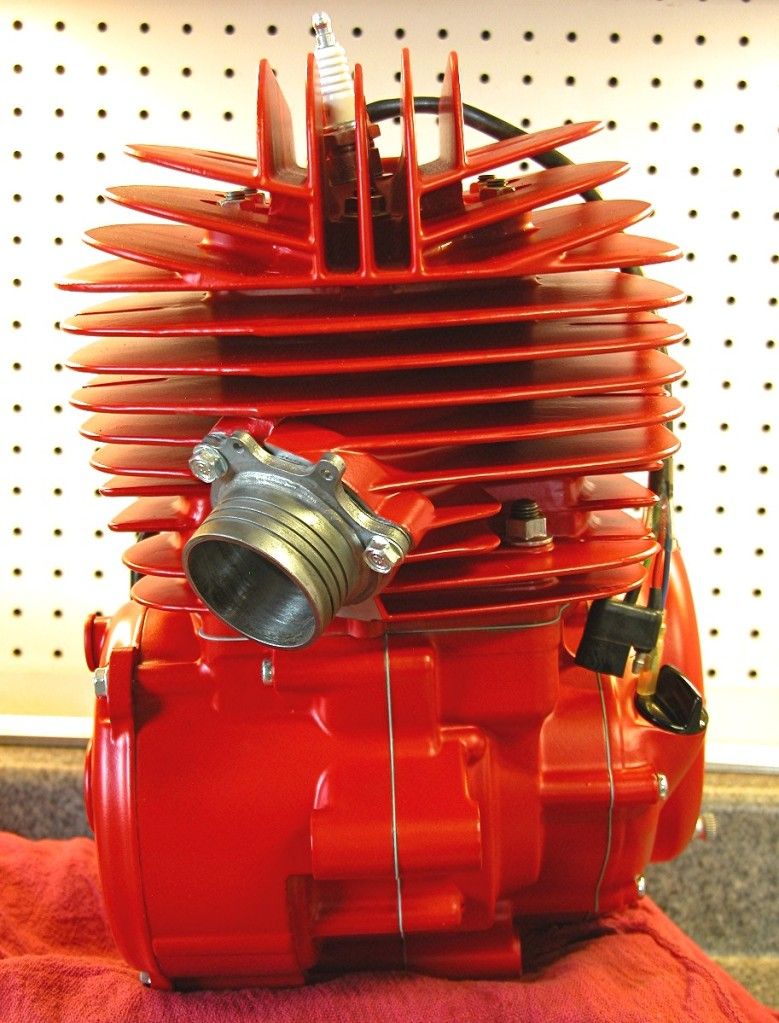
Restored and powder coated head.
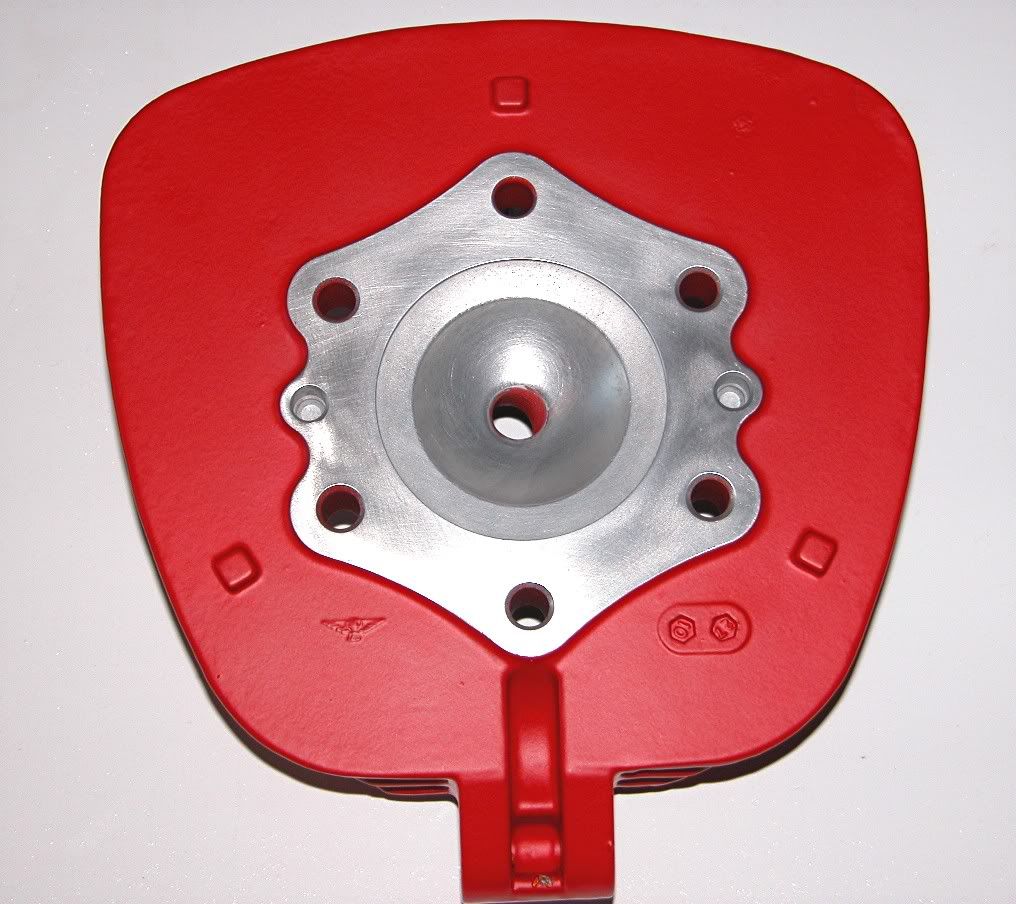
Combustion chamber.

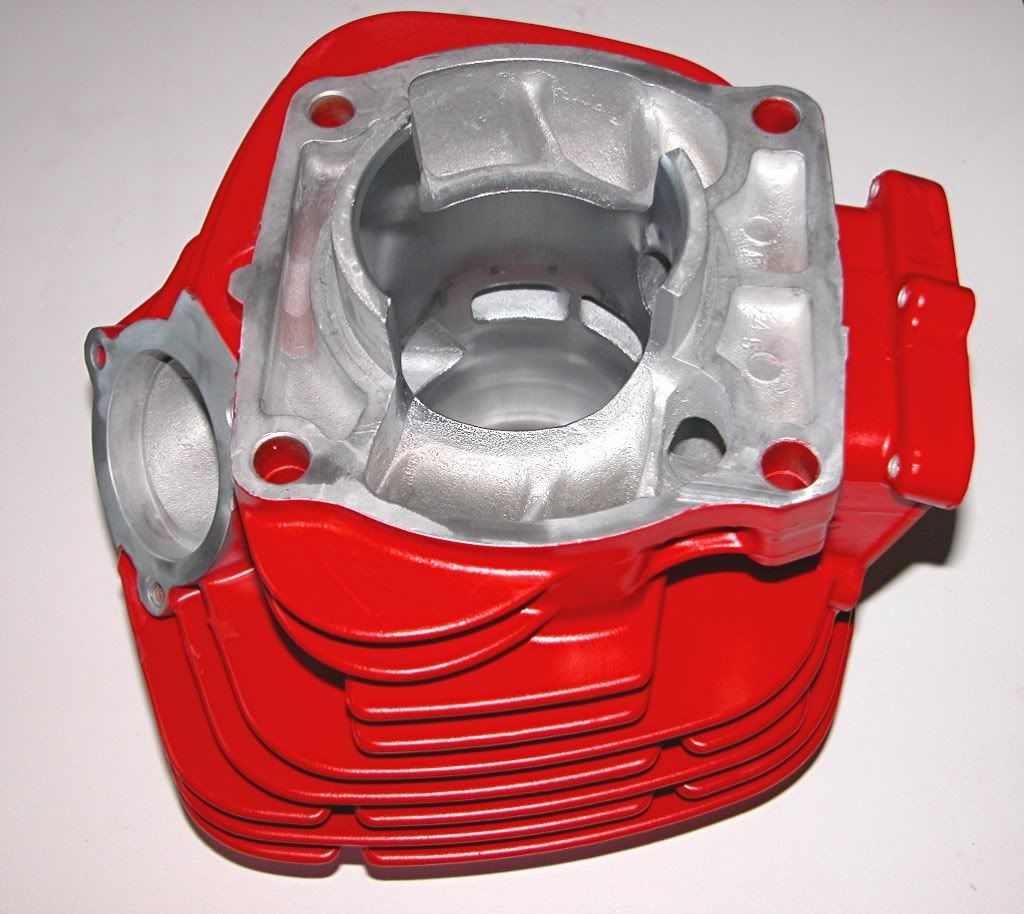
Cylinder after media blast, hot solvent tank, ultrasonic parts wash and powder coat.


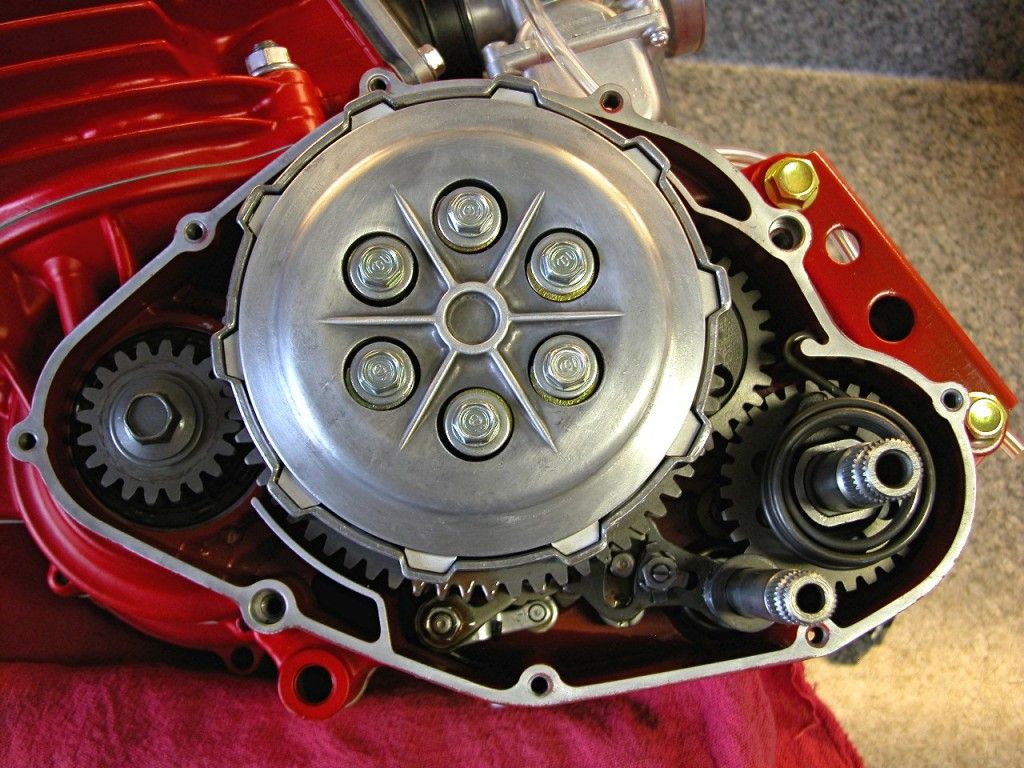
The Right side case was restored and all springs, pawls, plungers along with all of the
clutch components were replaced with NOS.

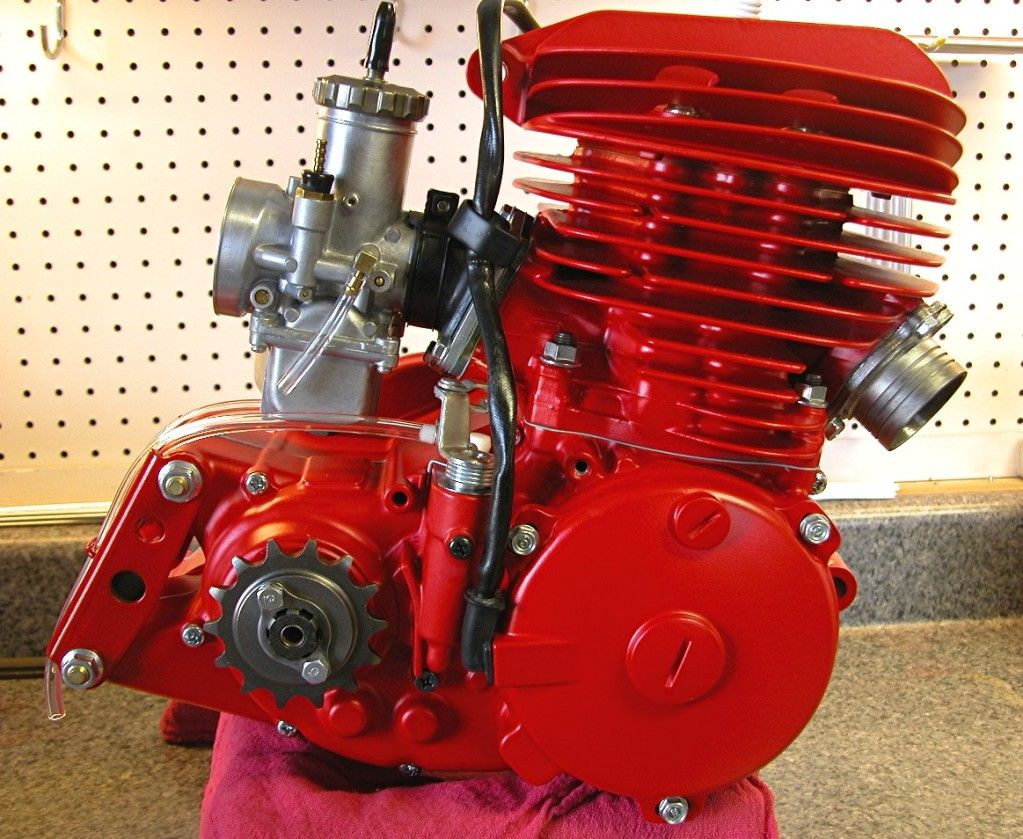
First test fit of the engine parts (no gaskets, no ignition)

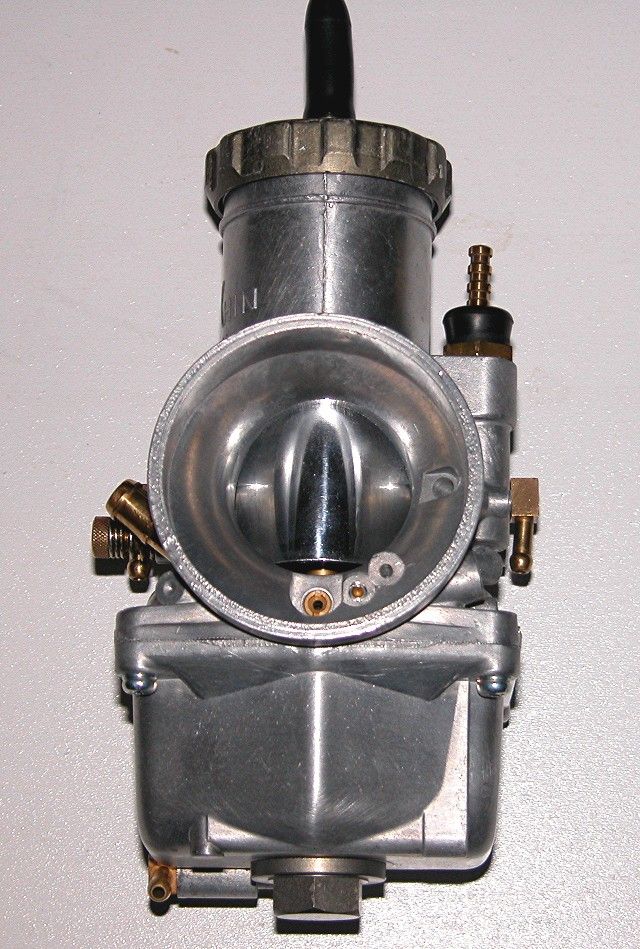
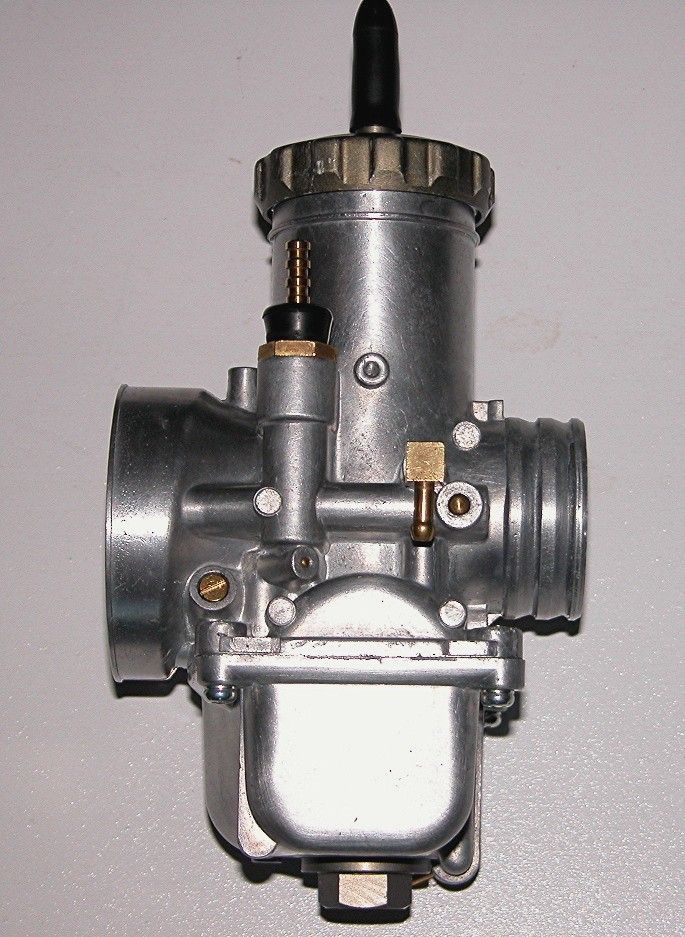
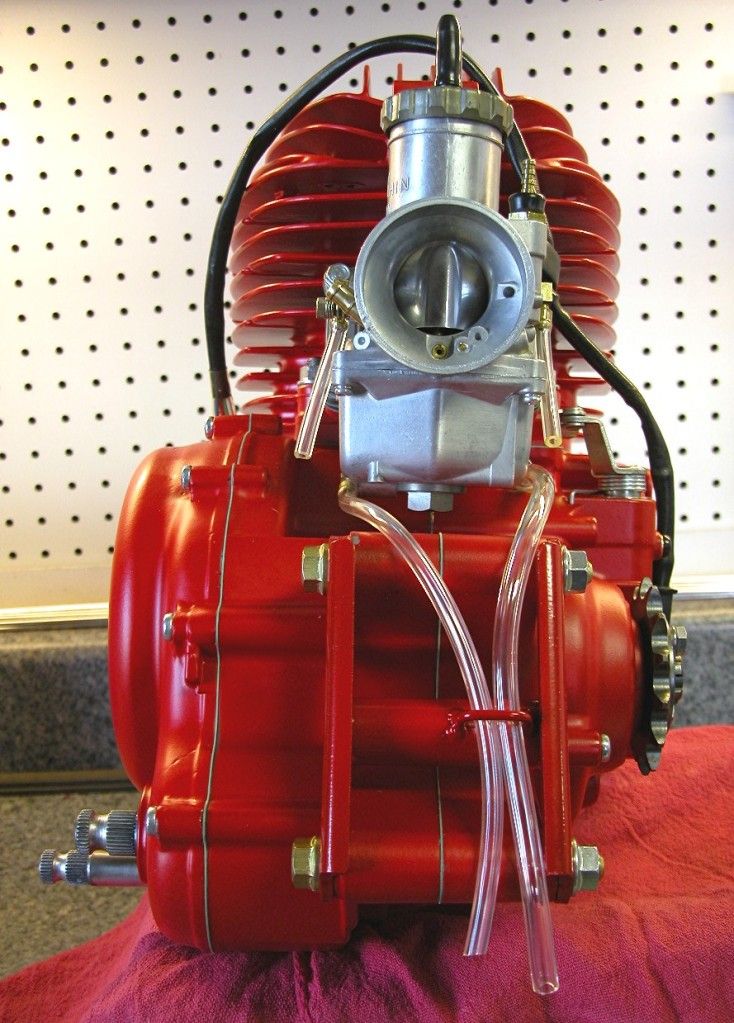
The carburetor got a trip through the hot solvent tank, then media blasted at low pressure
with crushed walnut shells.  Then all the parts spent some time in the ultrasonic parts washer
followed by a complete rebuild replacing all the wear items and finished off with a NOS throttle
body top, NOS choke assemble and new hardware and vent hoses.


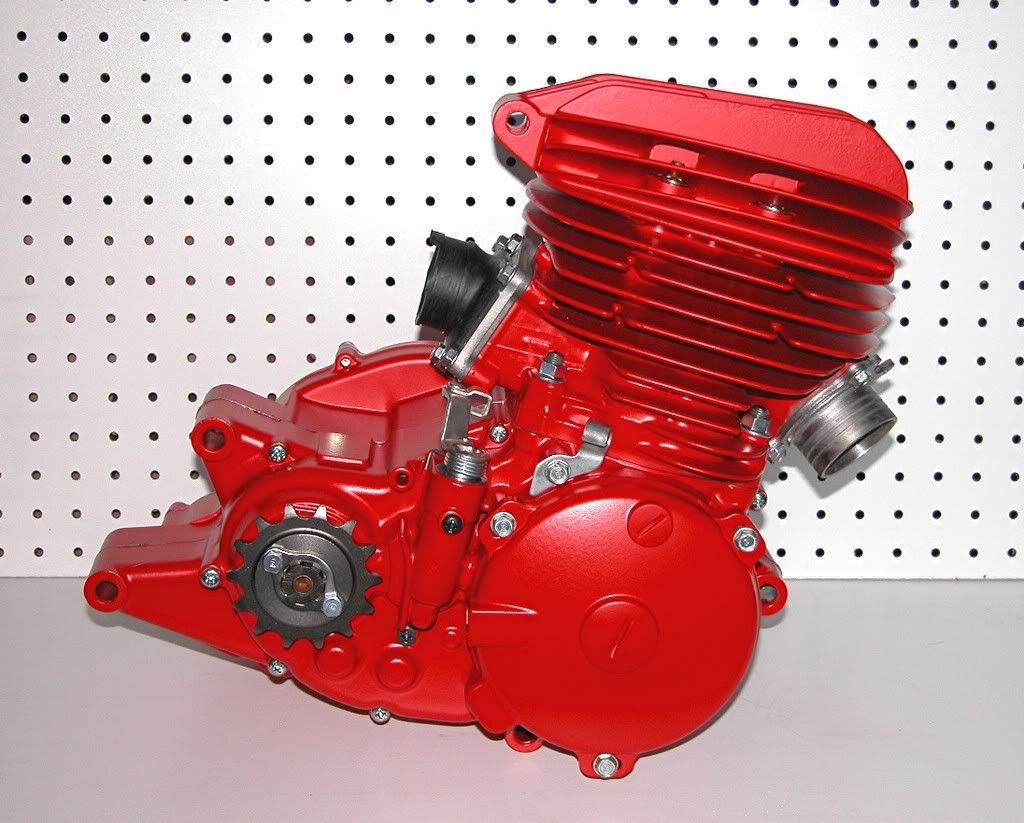
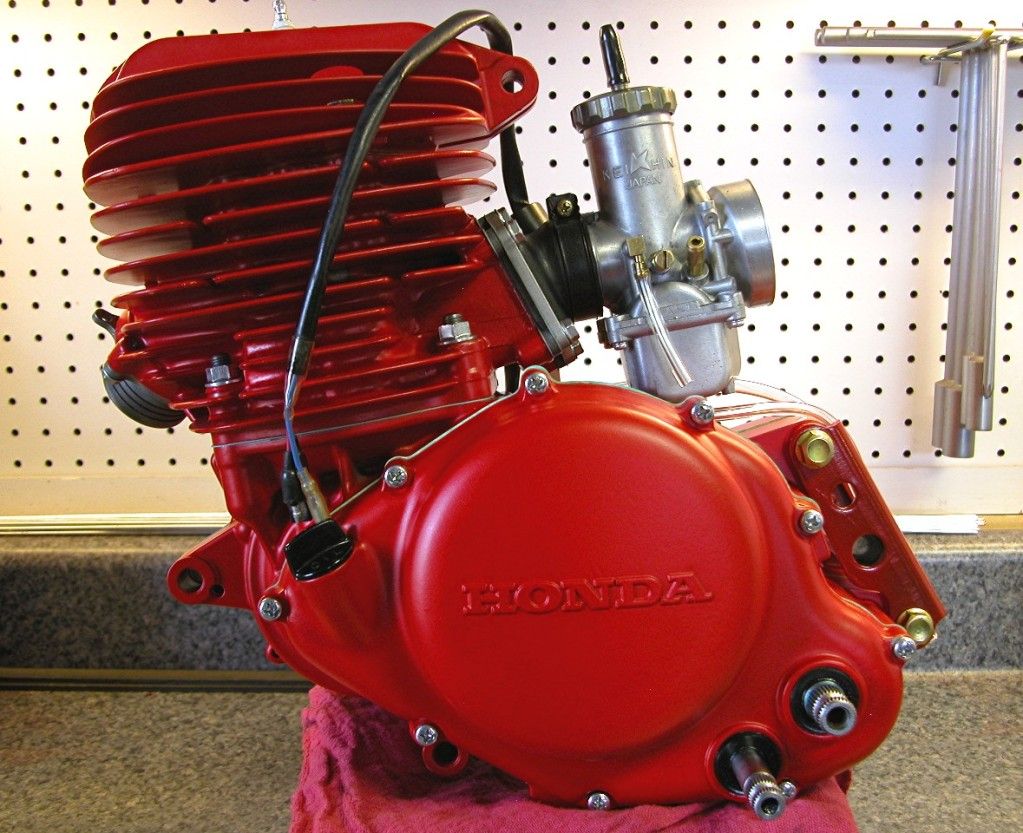
Finally, I re-assembled the engine with NOS Honda gaskets and performed a leak down test.
The engine maintained 6 psi for 7+ minutes, a nice tight engine.
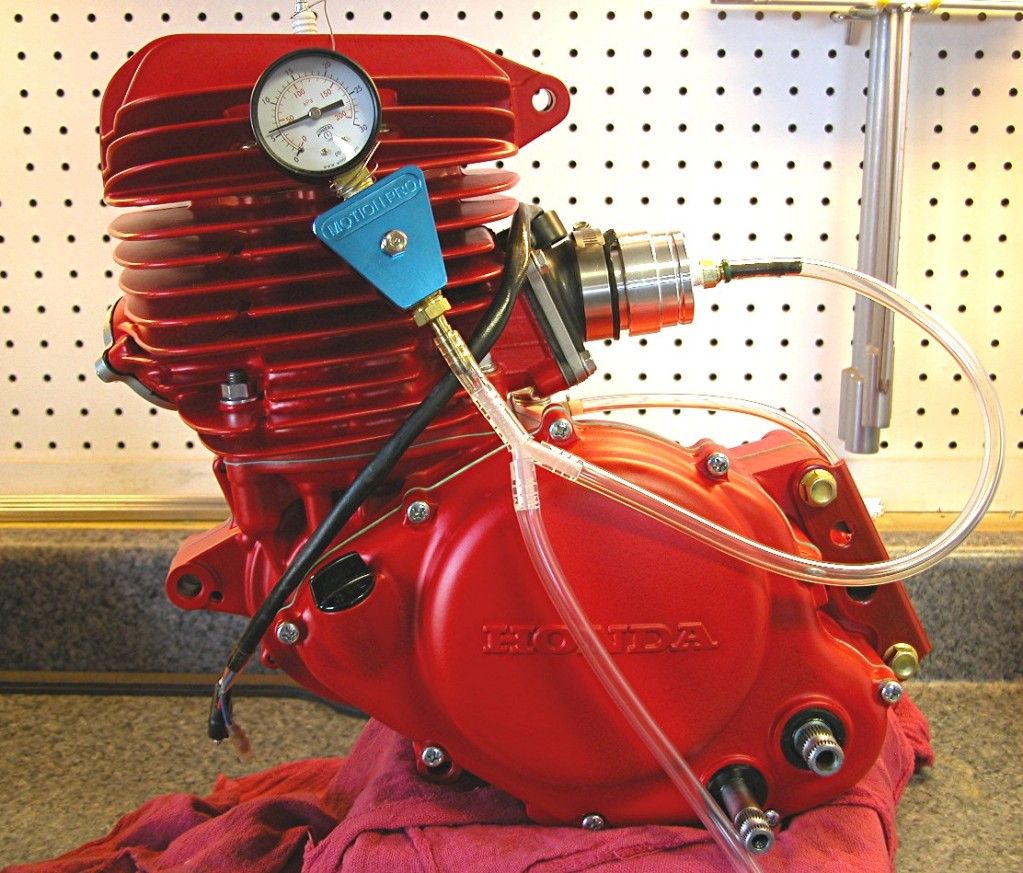

Finished.


I'll post the frame resto process next.

dogger


« Last Edit: December 31, 1969, 04:00:00 PM by ' »

Offline Lolerbabop

  • Posts: 0
    • View Profile
1979 Honda CR250R Resto Engine
« Reply #1 on: August 19, 2012, 11:43:25 PM »
That's some damn fine work right there.
« Last Edit: December 31, 1969, 04:00:00 PM by ' »

Offline twosmoke595

  • Posts: 0
    • View Profile
1979 Honda CR250R Resto Engine
« Reply #2 on: August 19, 2012, 11:43:58 PM »
sweet baby newborn jesus!!!!!!!!!!!!
« Last Edit: December 31, 1969, 04:00:00 PM by ' »

Offline _X_

  • Professional
  • *****
  • Posts: 272
  • M.I.R.A.
    • View Profile
1979 Honda CR250R Resto Engine
« Reply #3 on: August 19, 2012, 11:52:33 PM »
I love Hondas! i can see why you are going to keep her. qeustion though, do ride these beauts or just look at them?
« Last Edit: December 31, 1969, 04:00:00 PM by ' »

Offline citabjockey

  • Expert
  • ****
  • Posts: 145
    • View Profile
    • Yamaha Vintage Enduros
1979 Honda CR250R Resto Engine
« Reply #4 on: August 20, 2012, 12:01:58 AM »
Do you own a powerder coat shop (or have you put the shop's owner's kids through college)?

That is one amazing bike!!!

Why the paint/powder on the inside of the cases?
« Last Edit: December 31, 1969, 04:00:00 PM by ' »
Yamaha CT3, RT3, MX125, SC500, Toy Prius, Diesel F250 (it all balances out)

Offline Logan Dewey

  • Posts: 0
    • View Profile
1979 Honda CR250R Resto Engine
« Reply #5 on: August 20, 2012, 01:40:03 AM »
IT'S SO BEAUTIFUL!
« Last Edit: December 31, 1969, 04:00:00 PM by ' »

Offline motoxr377

  • Junior
  • **
  • Posts: 49
  • RM GUY
    • View Profile
1979 Honda CR250R Resto Engine
« Reply #6 on: August 20, 2012, 02:27:32 AM »
sweet baby newborn jesus!!!!!!!!!!!!

!!!!SAME!!!!

Dogger, you do the best work. Your CR500/CR250 engine builds are the gold standard. I've followed them on everything from ATM to Banned.
Top shelf.
« Last Edit: December 31, 1969, 04:00:00 PM by ' »

Offline SachsGS

  • Professional
  • *****
  • Posts: 1235
    • View Profile
1979 Honda CR250R Resto Engine
« Reply #7 on: August 20, 2012, 03:11:49 AM »
Nice work! I once Ebayed a 79 CR250 with Fox airshocks to a guy in Scotland.
« Last Edit: December 31, 1969, 04:00:00 PM by ' »

Offline riffraff

  • Professional
  • *****
  • Posts: 487
  • Still smokin' after all these years
    • View Profile
1979 Honda CR250R Resto Engine
« Reply #8 on: August 20, 2012, 04:03:14 AM »
Freakin' beautiful!!!
« Last Edit: December 31, 1969, 04:00:00 PM by ' »
aaahhhhh yes, I remember the good old days

Offline TMKIWI

  • Professional
  • *****
  • Posts: 1634
    • View Profile
1979 Honda CR250R Resto Engine
« Reply #9 on: August 20, 2012, 09:32:45 AM »
Nice work Dogger.
« Last Edit: December 31, 1969, 04:00:00 PM by ' »
If you don't fall off you are not going hard enough

Offline dogger315

  • Expert
  • ****
  • Posts: 113
    • View Profile
1979 Honda CR250R Resto Engine
« Reply #10 on: August 20, 2012, 05:17:42 PM »
Thanks for the thumbs up guys.  ;D

Quote
do ride these beauts or just look at them?
As you can see from the motor build, these aren't display pieces.  They are not raced or
even ridden in the dirt, but I start them up on a regular basis and treat my neighbors to
a two stroke "symphony" up and down the street.

I raced the '79 when it was the state-of-the-art.  Nowadays, I prefer a plush 12+ inches
of suspension and cheap, readily available replacement parts for the dirt.

Quote
Do you own a powerder coat shop (or have you put the shop's owner's kids through college)?

Yes and no.  I have a small, well equipped shop that includes powder coating equipment.  I do all of
my own work on these restos except Cadmium and chrome plating, which I source.  I decided when
I first got into this gig, I was going to do it right.  I already knew how to build and modify engines, but
I had never laced and trued a wheel, welded or fabricated anything, used a spray gun, etc.  I learned
a lot from trial and error and also the school of hard knocks.  I also spent the time and money on
training.  I spent some time at the Lincoln welding school getting my basic and advanced motorsports
certifications, same deal with PPG and painting.  Now I feal pretty comfortable tackling just about
any project.

Quote
Why the paint/powder on the inside of the cases?
When I first split the cases, I noticed a great deal of overspray.  I assume when Honda originally painted
these parts, they went down some kind of production line suspended on a wire and were hit with a
spray gun, and paint went everywhere.  I decided to follow an old engine build trick and coat the inside
with glyptal paint.  This paint has been used for years to smooth engine internals and speed the flow
of oil.  Just a little extra detail that no one would normally see, but I know it's there. 

Quote
I once Ebayed a 79 CR250 with Fox airshocks to a guy in Scotland
That had to take a few stamps.

dogger
« Last Edit: December 31, 1969, 04:00:00 PM by ' »

Offline _X_

  • Professional
  • *****
  • Posts: 272
  • M.I.R.A.
    • View Profile
1979 Honda CR250R Resto Engine
« Reply #11 on: August 20, 2012, 10:16:26 PM »
Right on man, toatally understand the reasoning. again great work.
« Last Edit: December 31, 1969, 04:00:00 PM by ' »

Offline cnrcpla

  • Novice
  • *
  • Posts: 0
    • View Profile
1979 Honda CR250R Resto Engine
« Reply #12 on: August 21, 2012, 02:19:08 AM »
Nice work man. Does the powder coat hold up better to the engine heat than enamel paint? Or is it about the same?
« Last Edit: December 31, 1969, 04:00:00 PM by ' »