Coming Soon
Home > Forum


Author Topic: My next project  (Read 30700 times)

0 Members and 1 Guest are viewing this topic.

Offline cnrcpla

  • Novice
  • *
  • Posts: 0
    • View Profile
My next project
« Reply #75 on: June 26, 2013, 03:37:02 PM »
It's definetly a '93 case. The gasket they sent is definetly not from a '93 I guess, as you can see in the reed induction area there is a small piece that should come seperate from the gasket. Neither of the ones I got had come like that. The VIN confirms it is a '93, so I don't understand... Maybe the wrong part came in  ???  Thanks for the pics TMKIWI.
« Last Edit: December 31, 1969, 04:00:00 PM by ' »

Offline cnrcpla

  • Novice
  • *
  • Posts: 0
    • View Profile
My next project
« Reply #76 on: July 13, 2013, 06:33:24 PM »
Sorry for the lack of updates, I just got a new job so I've been working my @ss off for the last couple weeks. Luckely, I finally got more money to throw at this project. I finally got the correct gasket on order, apparently the one that came in was for an RMX or something like that. So by Tuesday I hope to have the cases back together and mounted back in the back. I'd also like to have my new swingarm bearings in and have a rolling chassis once again. After that, I'll be waiting on money for a top end kit for this bike and she'll be ripping. Can't wait to hear this thing run. I'm definitely gunna wring it's neck for all the crap it's put me through  ;D
« Last Edit: December 31, 1969, 04:00:00 PM by ' »

Offline cnrcpla

  • Novice
  • *
  • Posts: 0
    • View Profile
My next project
« Reply #77 on: July 25, 2013, 04:33:32 AM »
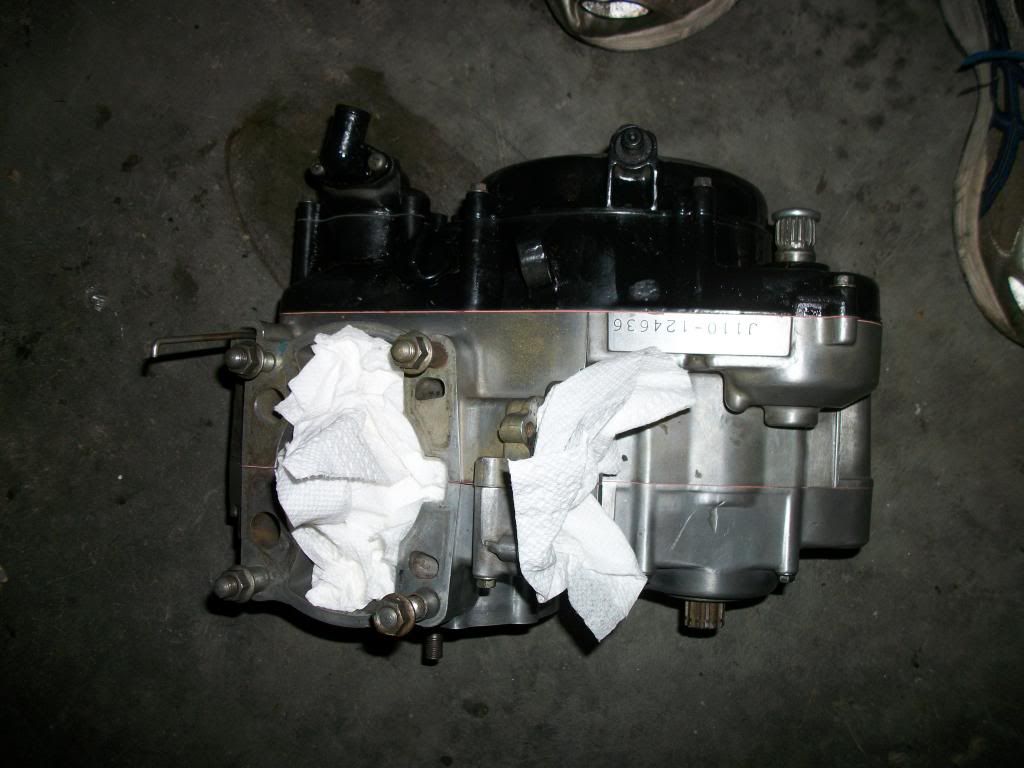
Finally got some time to wrok on the thing. Got the cases all put back together, new bearings, seals, crank, and some other odds and ends in her. Got the clutch straightened out as well. I'll hopefully be dropping the bottom end in the frame tomorrow, and I'll be hooking up the carb and reeds and radiator, as well as wiring it all up. I got swingarm bearings and new tires on order. So now all I need is a piston and rings and this thing will be ready to rip! Here's my progress thus far:

« Last Edit: December 31, 1969, 04:00:00 PM by ' »

Offline cnrcpla

  • Novice
  • *
  • Posts: 0
    • View Profile
My next project
« Reply #78 on: July 25, 2013, 04:38:01 AM »
Oh yeah, the crank seemed a tiny bit hesitant to move until I put the trans oil in. I guess the oil got the right side crank seal all lubed up? This is my first bottom end rebuild so I don't have any experience here  ;D
« Last Edit: December 31, 1969, 04:00:00 PM by ' »

Offline _X_

  • Professional
  • *****
  • Posts: 272
  • M.I.R.A.
    • View Profile
My next project
« Reply #79 on: July 25, 2013, 10:04:21 AM »
keep at it cnrcpla.
« Last Edit: December 31, 1969, 04:00:00 PM by ' »

Offline TotalNZ

  • Expert
  • ****
  • Posts: 247
    • View Profile
My next project
« Reply #80 on: July 25, 2013, 10:09:13 AM »
Don't panic, She'll feel a bit tight at first. New seals and grease in the new bearings will do that.
Looks like you're doing a top job of the rebuild.
« Last Edit: December 31, 1969, 04:00:00 PM by ' »

Offline cnrcpla

  • Novice
  • *
  • Posts: 0
    • View Profile
My next project
« Reply #81 on: July 25, 2013, 03:11:32 PM »
Thanks guys! I'm getting so impatient to hear this thing run. Can't wait to swing a leg over and let it rip.
« Last Edit: December 31, 1969, 04:00:00 PM by ' »

Offline gpnewhouse7

  • Posts: 0
    • View Profile
My next project
« Reply #82 on: July 25, 2013, 05:24:39 PM »
Thanks guys! I'm getting so impatient to hear this thing run. Can't wait to swing a leg over and let it rip.

Just don't do what a friend of mine has just done with his 2011 sx 150 after a full bottom and top end rebuild. He ran it in as instructed in the manual then went ahead changed the gearbox oil and air filter and went back out again to really give it some, unfortunately he didn't quite fit his new filter properly and a whole load of gritty dust and water got into his freshly rebuilt engine and he is now rebuilding it all over again.


« Last Edit: December 31, 1969, 04:00:00 PM by ' »

Offline cnrcpla

  • Novice
  • *
  • Posts: 0
    • View Profile
My next project
« Reply #83 on: July 25, 2013, 06:51:57 PM »
I've run into a little snag. I can't get the right side cover to seat evenly which is causing a massive leak of trans fluid. I've ruled out everything, the centering dowels, the governor, and even the main crank. All are seated and installed properly. I looked at the shift shaft and it seemed to be sticking out more than it should which I suspect is causing my clearance issues. Is it supposed to be lined up so that the small stud is in the machined hole in the gear selector? If so, how can I align it properly?
« Last Edit: December 31, 1969, 04:00:00 PM by ' »

Offline citabjockey

  • Expert
  • ****
  • Posts: 145
    • View Profile
    • Yamaha Vintage Enduros
My next project
« Reply #84 on: July 25, 2013, 09:00:53 PM »
Looks like your shifter return spring is not centered oveer its boss on the inner case? I will take a guess and say you can't shift gears properly by hand right now? I think you need to pull out the shifter shaft and re-insert it and make sure  the fingers on the spring properly surround the boss and that that pin on the shifter plate goes in there as well.


I've run into a little snag. I can't get the right side cover to seat evenly which is causing a massive leak of trans fluid. I've ruled out everything, the centering dowels, the governor, and even the main crank. All are seated and installed properly. I looked at the shift shaft and it seemed to be sticking out more than it should which I suspect is causing my clearance issues. Is it supposed to be lined up so that the small stud is in the machined hole in the gear selector? If so, how can I align it properly?

« Last Edit: December 31, 1969, 04:00:00 PM by ' »
Yamaha CT3, RT3, MX125, SC500, Toy Prius, Diesel F250 (it all balances out)

Offline cnrcpla

  • Novice
  • *
  • Posts: 0
    • View Profile
My next project
« Reply #85 on: July 25, 2013, 10:24:03 PM »
That was exactly it. Thanks a bunch man! Got it all buttoned up and put it. Also got the rear fender mounted and tail pipe mounted. Good to know that the part of the frame I fabricated had the correct measurements  ;D Anyways, here's how it sits now.


« Last Edit: December 31, 1969, 04:00:00 PM by ' »

Offline TMKIWI

  • Professional
  • *****
  • Posts: 1634
    • View Profile
My next project
« Reply #86 on: July 26, 2013, 12:22:34 AM »
Looking good.
« Last Edit: December 31, 1969, 04:00:00 PM by ' »
If you don't fall off you are not going hard enough

Offline TotalNZ

  • Expert
  • ****
  • Posts: 247
    • View Profile
My next project
« Reply #87 on: July 26, 2013, 03:10:45 AM »
Looking good, but personally i'd ditch those KTM shrouds and put some RM ones back on.
« Last Edit: December 31, 1969, 04:00:00 PM by ' »

Offline Stusmoke

  • Posts: 0
    • View Profile
My next project
« Reply #88 on: July 26, 2013, 03:12:59 AM »
Looking good, but personally i'd ditch those KTM shrouds and put some RM ones back on.

Yeah definitely. If only because they look like such a dodgey job by the PO.
« Last Edit: December 31, 1969, 04:00:00 PM by ' »

Offline cnrcpla

  • Novice
  • *
  • Posts: 0
    • View Profile
My next project
« Reply #89 on: July 26, 2013, 03:26:29 AM »
That's the plan. Only problem is it isn't a '93 RM tank. So i have to find out what year/make the tank is and get shrouds accordingly. But I honestly want to get it running and ridable before I worry to much about cosmetics  ;D
« Last Edit: December 31, 1969, 04:00:00 PM by ' »