Coming Soon
Home > Forum


Author Topic: 1979 Honda CR250R Resto Frame and Suspension  (Read 4618 times)

0 Members and 1 Guest are viewing this topic.

Offline dogger315

  • Expert
  • ****
  • Posts: 113
    • View Profile
1979 Honda CR250R Resto Frame and Suspension
« on: August 20, 2012, 06:42:29 PM »
Next up was the frame.  Honda used Chrome Moly Steel to construct these frames so I used
Aluminum Oxide (AO) as my blast media.  AO does a good job of stripping paint and rust and
Chrome Moly would not be adversly affected by the more aggresive media.

After stripping the frame to bare metal.  I NDIed all the welds, checked the bottom of the cradle
rails for damage and inspected all the drain holes for signs of rust due to clogging.  The footpeg
perches had the usual "spread" damage caused by overweight baby boomers and big jumps.
This was easily repaired with some Chrome Moly plate welded in and ground down to the
original shape and size.  The other common problem area concerns the steering stop.  The
stop on these bikes consist of a single steel tab that protrudes from the front of the steering
tube.  Over the years, this tab gets beat on and wears down until the fork tubes can actually
wack the fuel tank putting a nice dent in the alloy.  This bike had such dents on both sides.
I used the same fix from the peg perches on the tab.

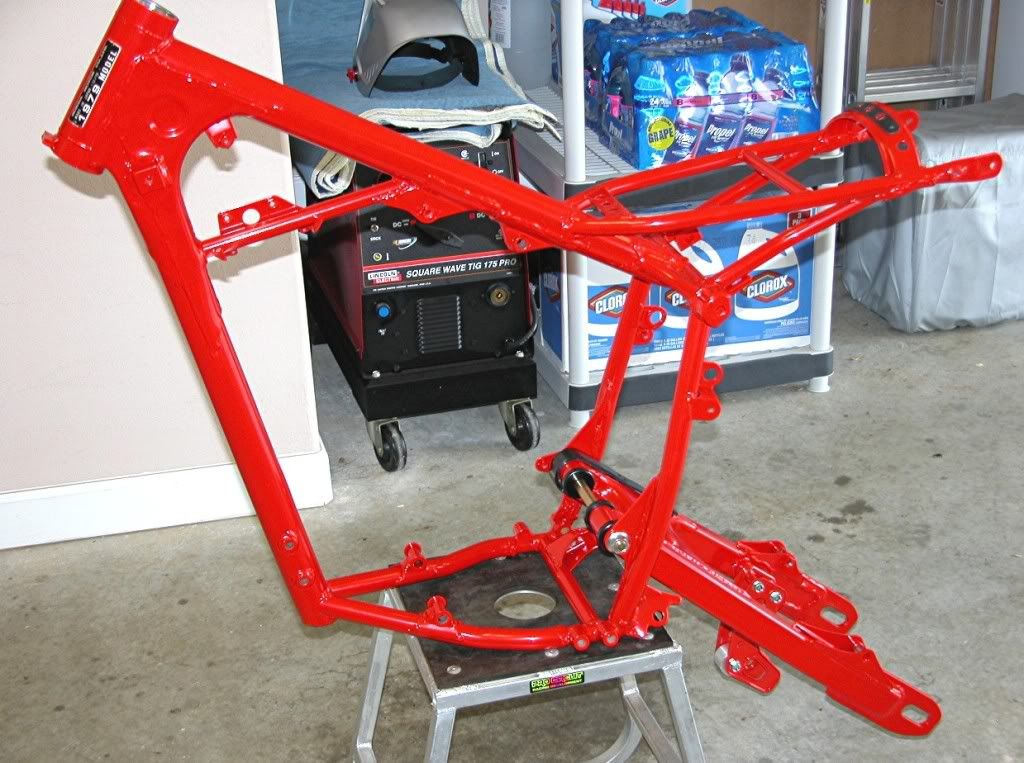
After all the weld repairs, I etched the frame and powder coated it with 90% gloss Tahitian Red.

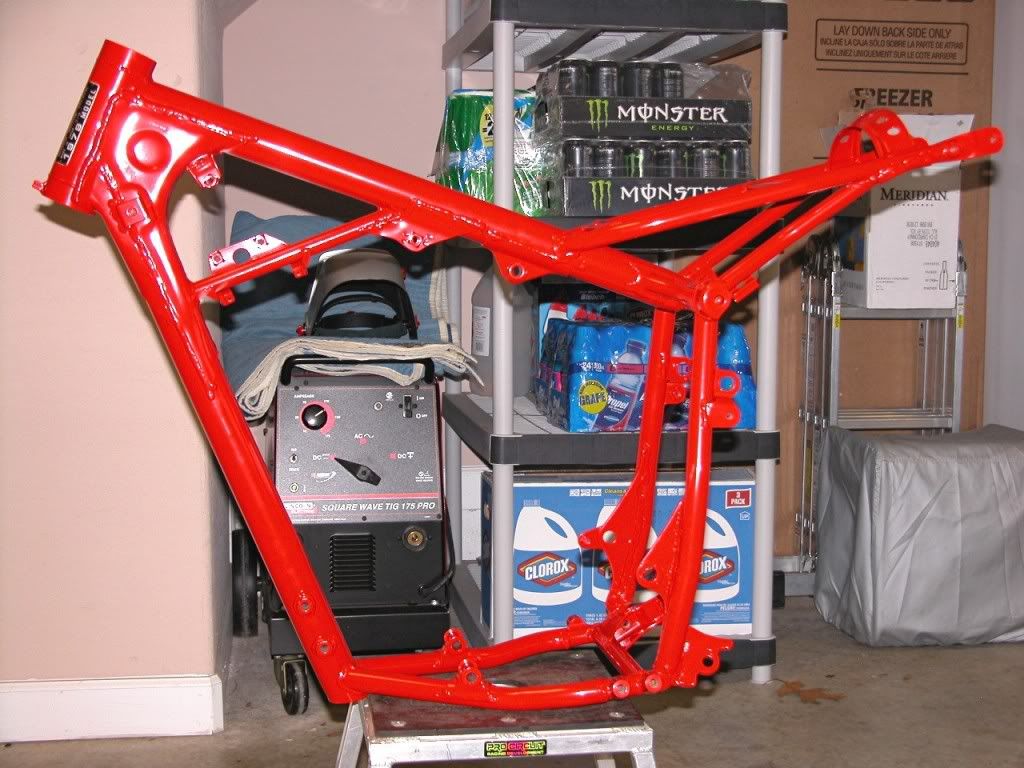
Here it is fresh out of the oven. 

I chased all the threaded holes and installed a pair of NOS Honda steering bearing shells.

While I was working the frame, I also stripped and inspected the swingarm.  I managed to find
a NOS chain buffer and replaced the bearings and seals with new.  The swingarm pivot bolt was
NLA so I restored the original.  This process would get a lot of action on this build because Honda
used a lot of Gold Cadmium plating during these years.  I stripped what was left of the original
plating using a strong alkaline bath, then polished the bolt to a mirror like finish before sending it
to my plater for a fresh coat of Gold Cad.


I also found an original NOS steel chain guide roller for the chain guide.  These are practically
non existant and most restorations will sport White or Silver painted plastic rollers.

Next up were the rear shocks.  The OE shocks were widely regarded as crap on these bikes and
most owners removed them and the OE tires as soon as possible.  The shocks on this bike were
original, but the Nitrogen charge had leaked out and there was no dampning.  I dis-assembled
them, removed the shock bushings and eyelets and tossed the cartridges.  I purchased half a
dozen OE cartridges from all over the world until I found two that still had their charge.  Both
were NOS but suffered from shelf damage and needed cosmetic restoration.  You can't powder
coat a pressurized chamber, so I painted the shock bodies with custom color matched PPG
paint.  I checked the OE springs for spec and they were good, so I powder coated them the
original gloss Black.  The perches and eyelets were stripped, polished and plated and I installed
NOS bushings and sleeves.


Here are some of the shock perches after stripping and polishing before being sent for plating

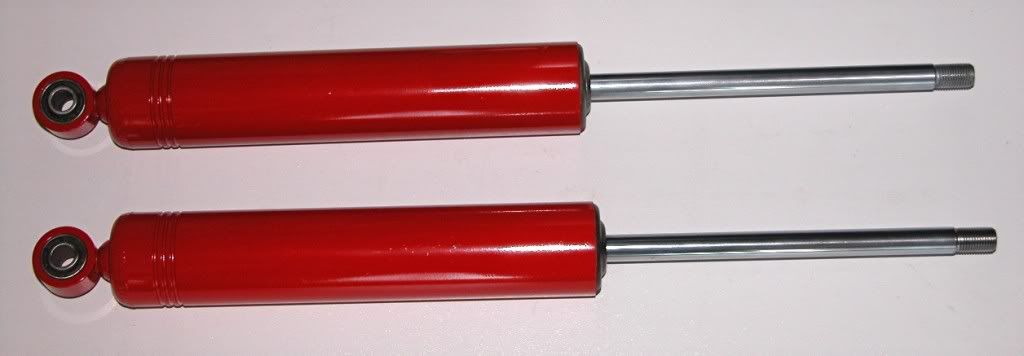
Freshly painted NOS shock cartridges

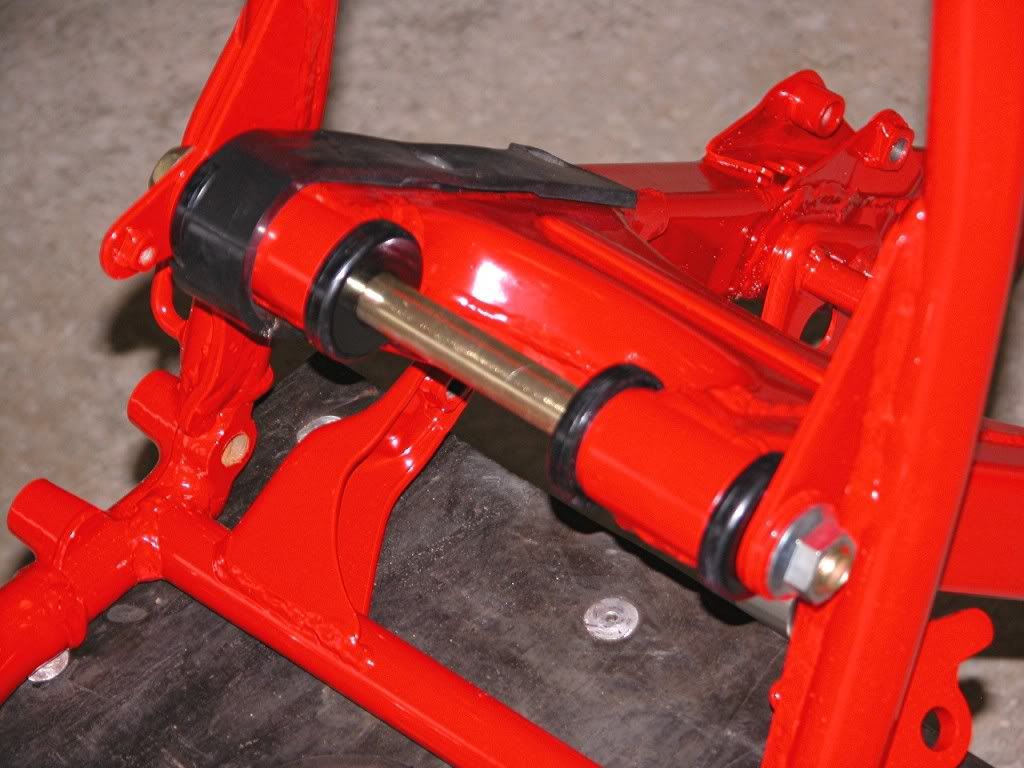
Pair of restored OE shocks

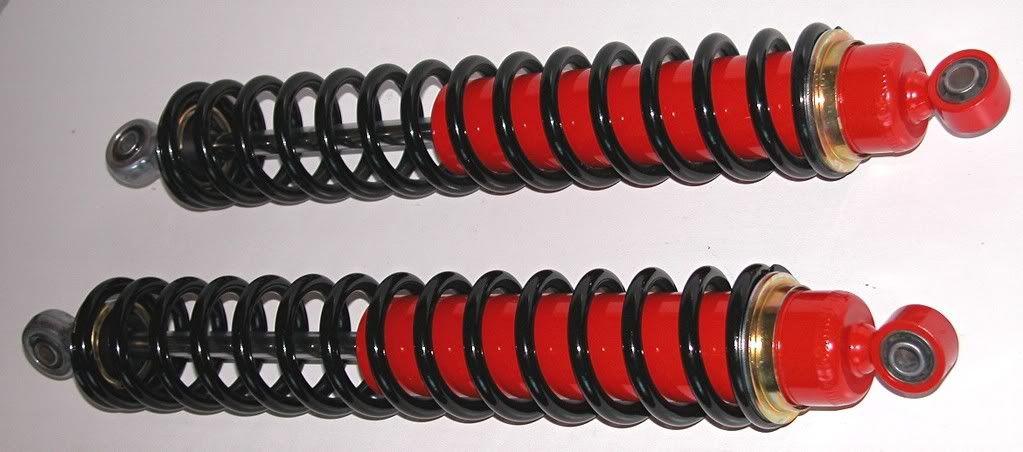
Restored shocks installed along with restored rear axle, pair of NOS chain adjusters and
footpegs.

The forks were in pretty sad shape mechanically and cosmetically.  I took them apart and
cleaned everything up.  Pretty much all the internals were junk, so I replaced everything
with NOS.  The cases were dented and scratched so I spent quite a bit of time rehabbing
them and finished them off with a nice OE satin finish using a Grey Scotchbrite pad and a
lathe.  I replaced the aftermarket fork boots with NOS Honda boots and clamps and I had
the upper fork tubes re-chromed.  Unfortunately, I can't seem to find any pictures of the
fork build process to post.

I finished the suspension portion by restoring the OE triple clamps.  Media blast with glass
beads, fill weld scratches and dents, etch and powder coat with Satin Black.  NOS hardware
and NOS Honda bearings.

Last item I'll cover in this post was the fuel tank resto.  The tank had numerous small dents
and one big (baseball size dent).  I soda blasted the tank to strip the rattle can paint then
popped the dents using one of my "secret" processes. ;)  I dis-assembled the pet**** then
cleaned it in a hot solvent tank.  I put the parts in a vibratory tumbler filled with dry-shine
for 24 hours.   

Restored pet****

I coated the tank with a high build primer and blocked and sanded until it was as smooth as I
could get it.  I painted it with the same PPG paint I used on the shocks before applying NOS
Honda wing and warning decals and a NOS fuel cap and vent hose.

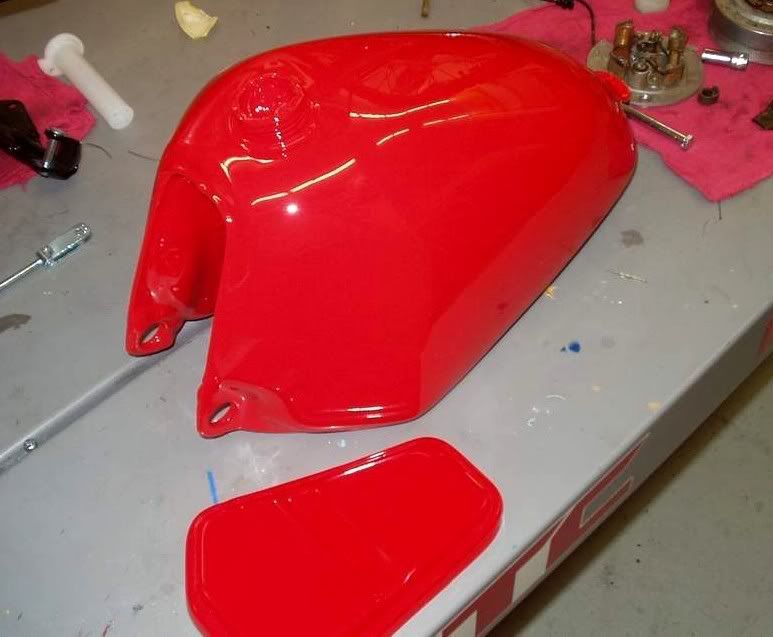
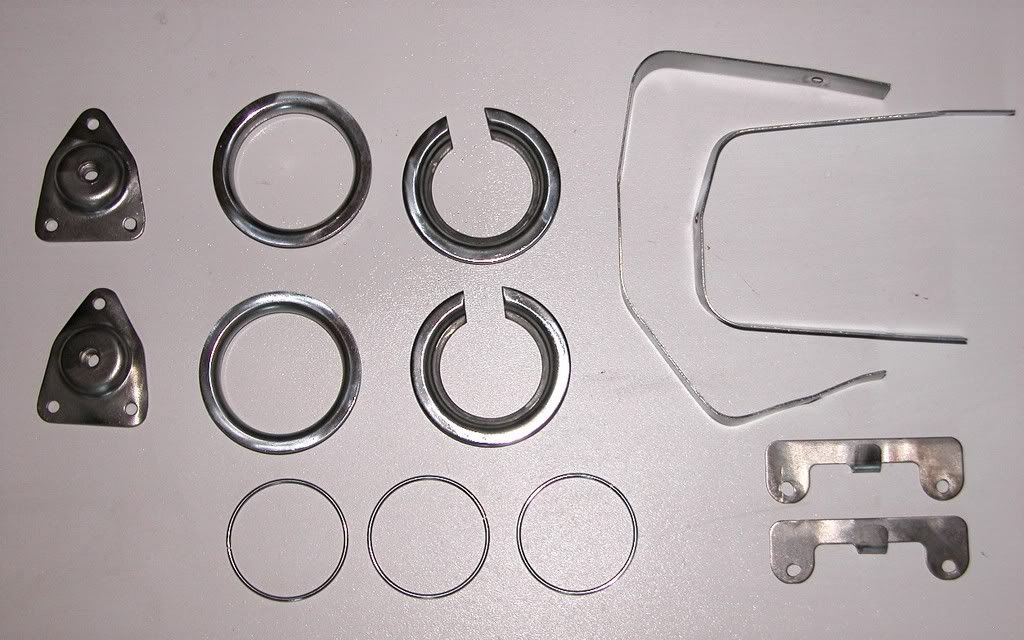
Tank with fresh paint next to color match panel

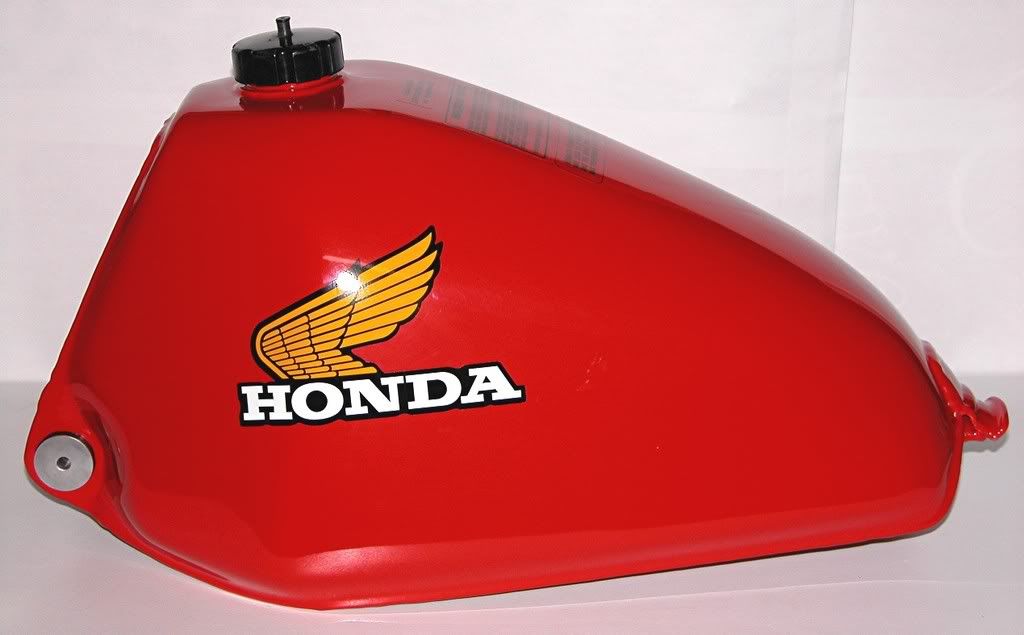
Finished tank with NOS fuel cap, mounting grommets and sleeves
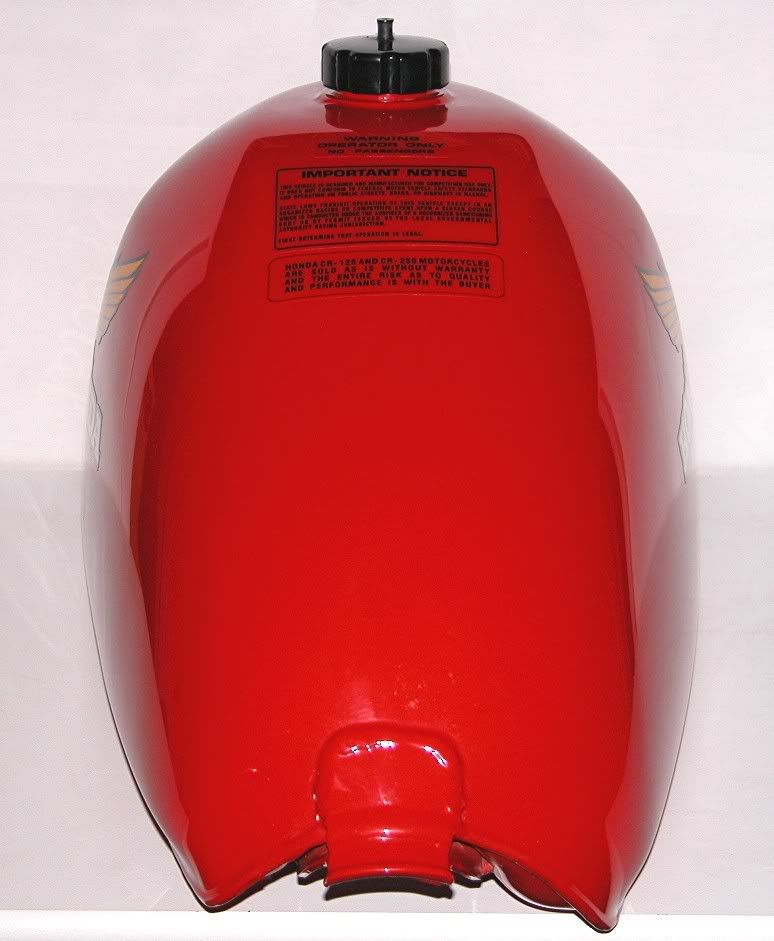
NOS warning labels

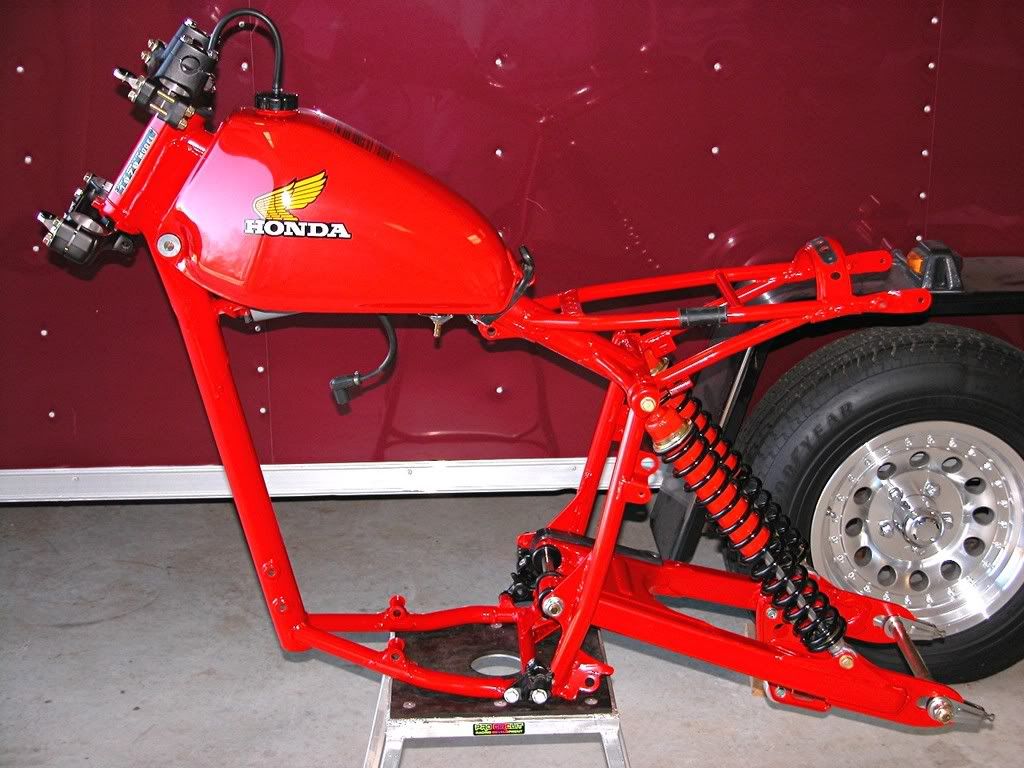
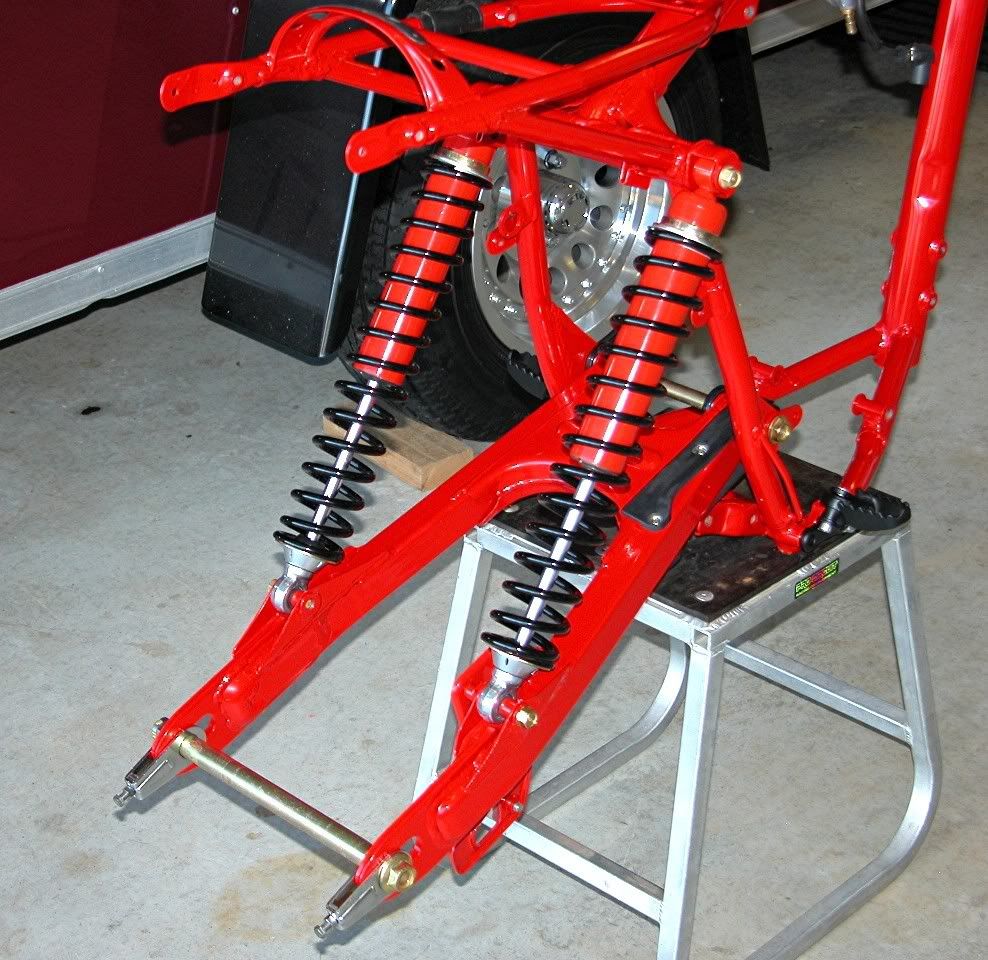
Tank and triples installed.

Next up will be the wheels, airbox and initial assembly.

dogger   
« Last Edit: December 31, 1969, 04:00:00 PM by ' »

Offline twosmoke595

  • Posts: 0
    • View Profile
1979 Honda CR250R Resto Frame and Suspension
« Reply #1 on: August 20, 2012, 08:47:07 PM »
looking forward to seeing the remainder of the build!
« Last Edit: December 31, 1969, 04:00:00 PM by ' »

Offline _X_

  • Professional
  • *****
  • Posts: 272
  • M.I.R.A.
    • View Profile
1979 Honda CR250R Resto Frame and Suspension
« Reply #2 on: August 20, 2012, 10:18:47 PM »
love the mag wheel on the back, but i don't think the came with those.
« Last Edit: December 31, 1969, 04:00:00 PM by ' »

Offline cnrcpla

  • Novice
  • *
  • Posts: 0
    • View Profile
1979 Honda CR250R Resto Frame and Suspension
« Reply #3 on: August 21, 2012, 02:10:55 AM »
Man dogger, you really know how to restore bikes. I envy your skills  ;D
« Last Edit: December 31, 1969, 04:00:00 PM by ' »

Offline citabjockey

  • Expert
  • ****
  • Posts: 145
    • View Profile
    • Yamaha Vintage Enduros
1979 Honda CR250R Resto Frame and Suspension
« Reply #4 on: August 21, 2012, 04:59:17 AM »
Ok, cough up that tank dent removal procedure!


please?

LoL
« Last Edit: December 31, 1969, 04:00:00 PM by ' »
Yamaha CT3, RT3, MX125, SC500, Toy Prius, Diesel F250 (it all balances out)

Offline gpnewhouse7

  • Posts: 0
    • View Profile
1979 Honda CR250R Resto Frame and Suspension
« Reply #5 on: August 21, 2012, 09:23:49 PM »
I so wish I had the money, tools (and skills) to restore a bike to that standard  :o I take my hat off to you dogger after you have fully restored (or built for that matter) a bike it is even better than I imagine they were when they left the factory.

I'm currently on restoring a tractor at the minute, I've been loving every minute of it but parts are ridiculously expensive for them so I've been forced to do my best with the original parts, still fun but I'd love to be able to restore something to the standard you restore things to.
« Last Edit: December 31, 1969, 04:00:00 PM by ' »

Offline dogger315

  • Expert
  • ****
  • Posts: 113
    • View Profile
1979 Honda CR250R Resto Frame and Suspension
« Reply #6 on: August 23, 2012, 08:19:02 PM »
Thanks guys!

Quote
Ok, cough up that tank dent removal procedure!
Sorry, ancient Chinese secret.

Love the tractor restoration - sounds like a hoot!  It's all fun and also a real challenge like you said.
I would appreciate it if you could pm me some pictures when you get it done.

dogger

« Last Edit: December 31, 1969, 04:00:00 PM by ' »

Offline gpnewhouse7

  • Posts: 0
    • View Profile
1979 Honda CR250R Resto Frame and Suspension
« Reply #7 on: August 24, 2012, 12:21:31 AM »
Thanks guys!

Quote
Ok, cough up that tank dent removal procedure!
Sorry, ancient Chinese secret.

Love the tractor restoration - sounds like a hoot!  It's all fun and also a real challenge like you said.
I would appreciate it if you could pm me some pictures when you get it done.

dogger

I will but it'll be a while yet as I still have to fix up the old doors, fabricate new mudguards, rear window frame and put a new floor in while still trying to keep the original look as much as I can as the tractor has always been looked after (we've had it from new back in 1972). But obviously the age and kind of work its been doing has taken its toll on it, so a LOT of TLC is in order and with parts being hard to find progress is slow.
« Last Edit: December 31, 1969, 04:00:00 PM by ' »

Offline nnudy34

  • Posts: 0
    • View Profile
1979 Honda CR250R Resto Frame and Suspension
« Reply #8 on: January 15, 2013, 08:30:26 PM »
I know you said you did a color match to make the color, what color did you use to make the match from?  Do you have the mixture breakdown because the color looks perfect.  I have a 76 cr125 and my dad has a 79 not sure if the eed was the same color in 76.
« Last Edit: December 31, 1969, 04:00:00 PM by ' »

Offline dogger315

  • Expert
  • ****
  • Posts: 113
    • View Profile
1979 Honda CR250R Resto Frame and Suspension
« Reply #9 on: January 18, 2013, 03:36:05 PM »
Quote
what color did you use to make the match from?
I used the underside of the fuel tank (no fade) for the color match.
The folks at the local auto body paint and supply used a spectral
analyzer to match the color and ginned up a paint recipe.  I don't
have any of the paint right now, but I still have some of the custom
color matched gloss Tahitian Red in powder for powder coating.

Your '76 and your Dad's '79 are the exact same color.  All CRs
were painted Tahitian Red from 76 to 82.  Honda switched to
Flash Red (more Orange), in 83.

dogger
« Last Edit: December 31, 1969, 04:00:00 PM by ' »