Coming Soon
Home > Forum


Author Topic: CRF Redemption: The 500 Project Part 2  (Read 4159 times)

0 Members and 1 Guest are viewing this topic.

Offline motoxr377

  • Junior
  • **
  • Posts: 49
  • RM GUY
    • View Profile
CRF Redemption: The 500 Project Part 2
« on: June 15, 2013, 01:20:52 AM »
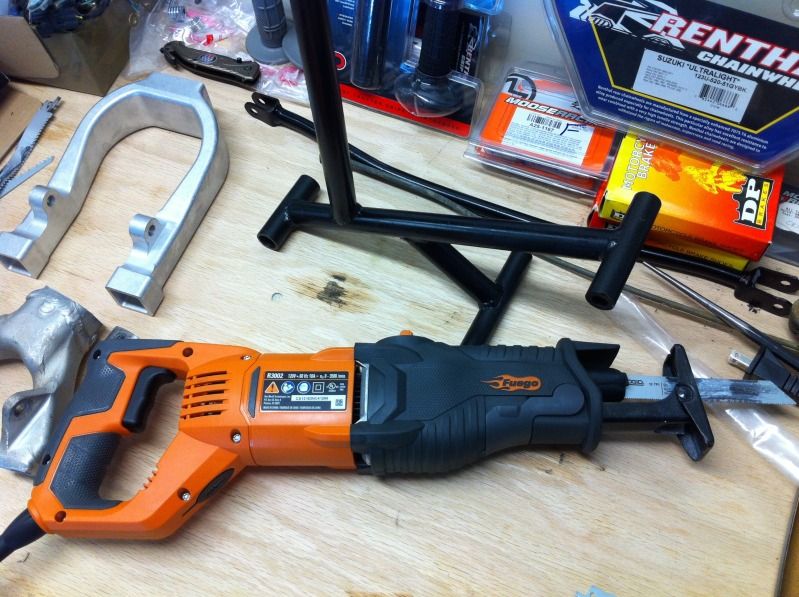
The 500 conversion reached its decisive point today, as I cut the lower engine mounts and Y-piece out of the cradle.  I used a Rigid Fuego Reciprocating Saw with a Bi-Metal blade, and will be going over the rough cuts with an aluminum sanding bit a la Dremel.

I am using the Conversion Parts 500 kit (available via eBay).  There are several PDF instruction manuals published by this guy, and it has removed virtually all headaches and hassles normally involved with this sort of undertaking. Check them out here: http://www.conversionparts500.com

As for welding, I am NOT the man for that task, so I have enlisted Brett Koufas of ICW Bikestands and Radiator Repairs/Mods to weld my fully jigged CR when the time comes (hopefully a couple weeks). ICW stands for "I Can Weld", so I think he'll do alright.  He'll also be doing some big end tanks and new spigots on the already well-sized CRF radiators.

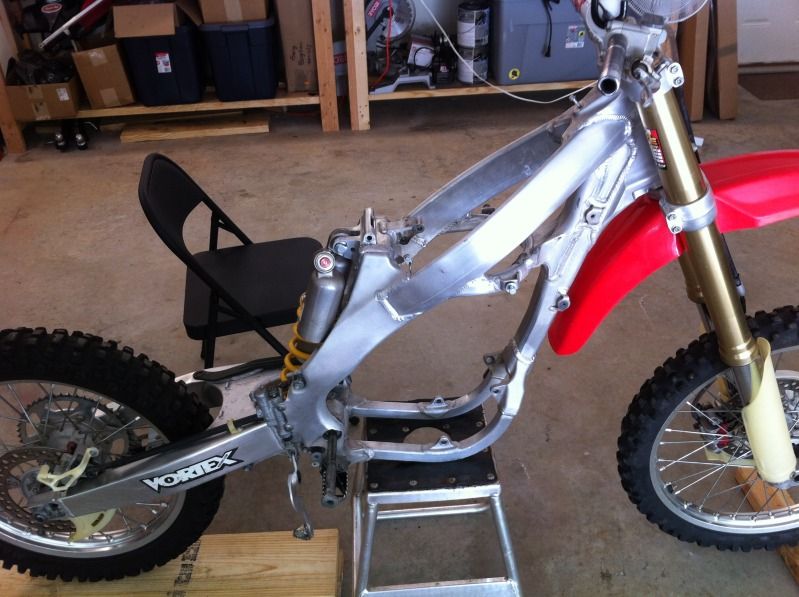
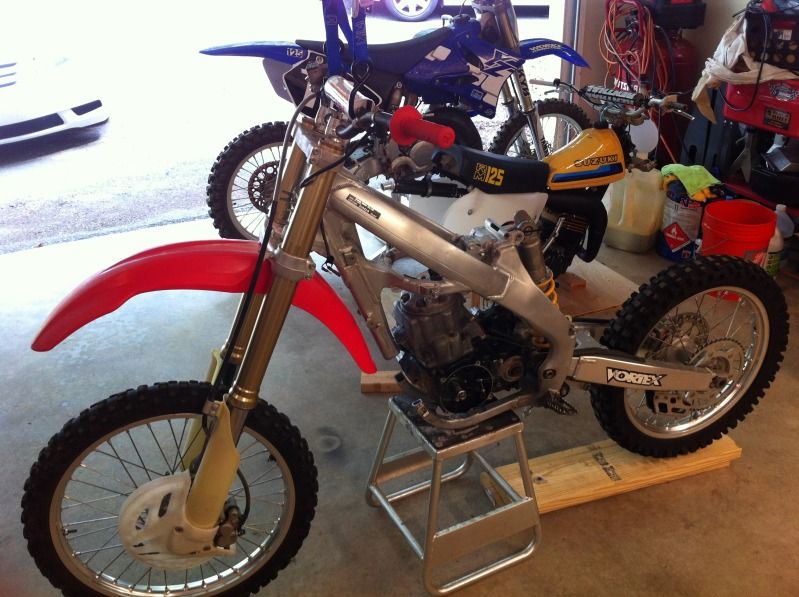
As the bike sat this morning:


First cut:


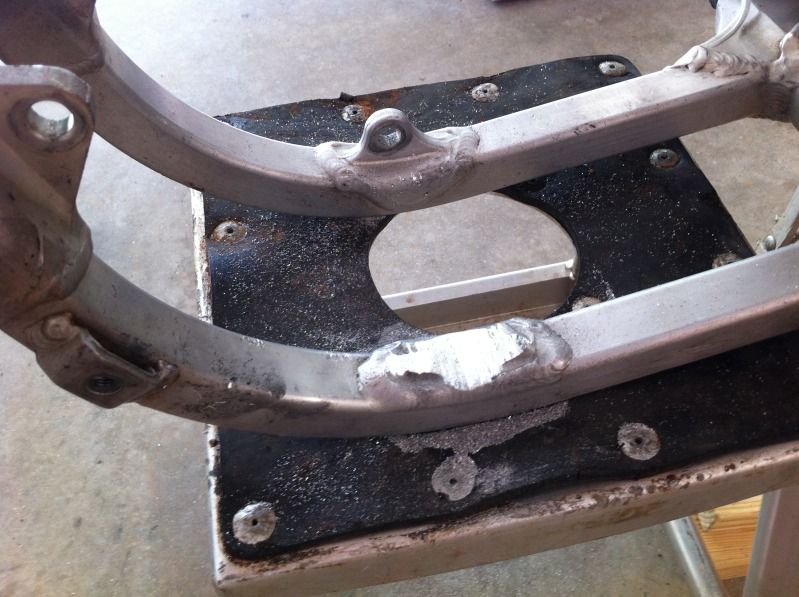
Both lower mounts off, I cut halfway in from both sides as it is on a slight bend in the cradle:


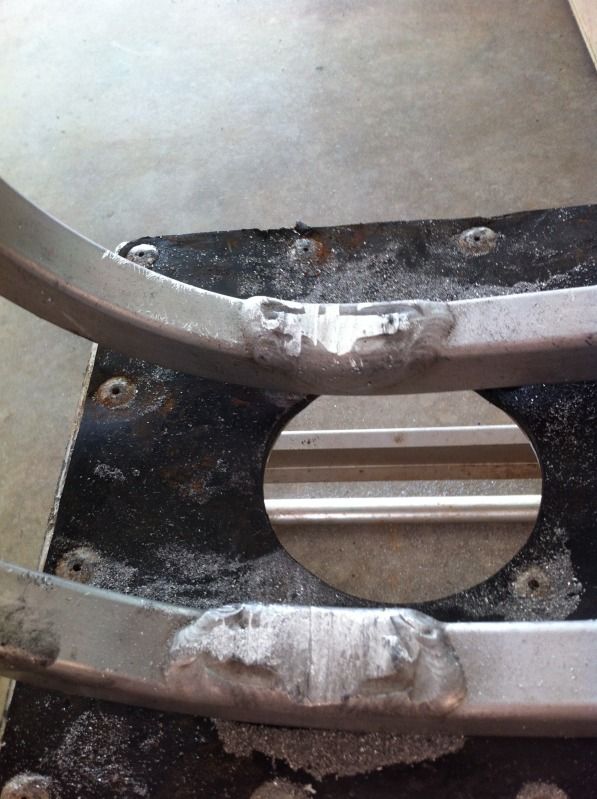
Now that the chunks are off, I'll go back through with a dremel and make them smooth.  I took care to leave a large rectangular pad of material on the frame so there would be a little more meat to weld to than the very thin cradle tubing.

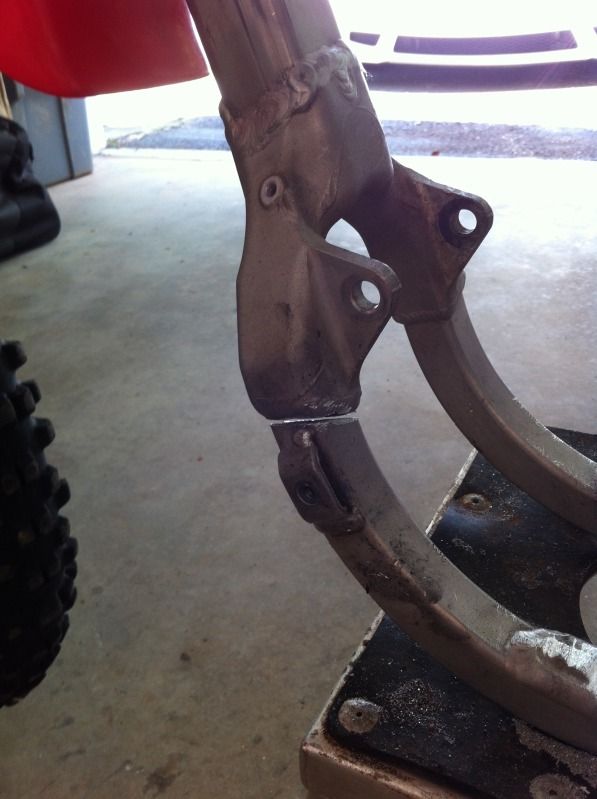
Next came extraction of the Y from the frame (only took one pic):


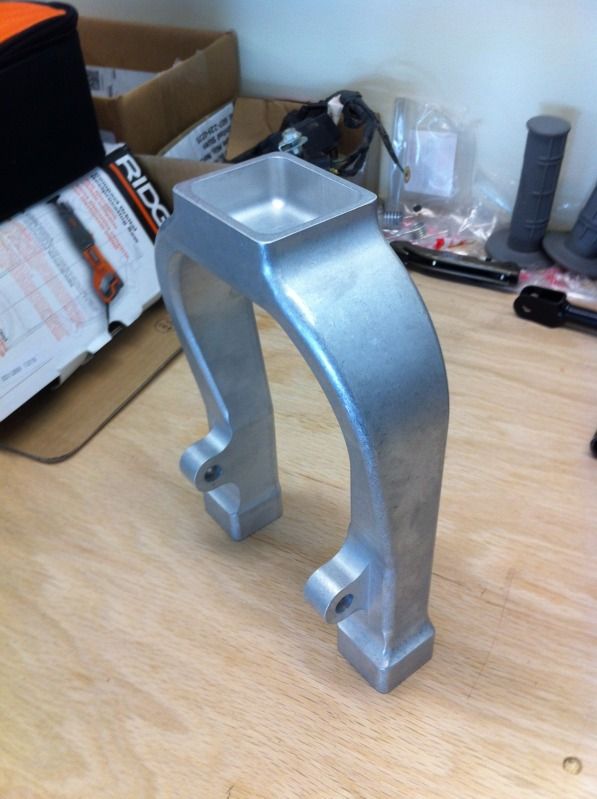
I'll be replacing the Y with this, a billet piece shot with walnuts to look cast:


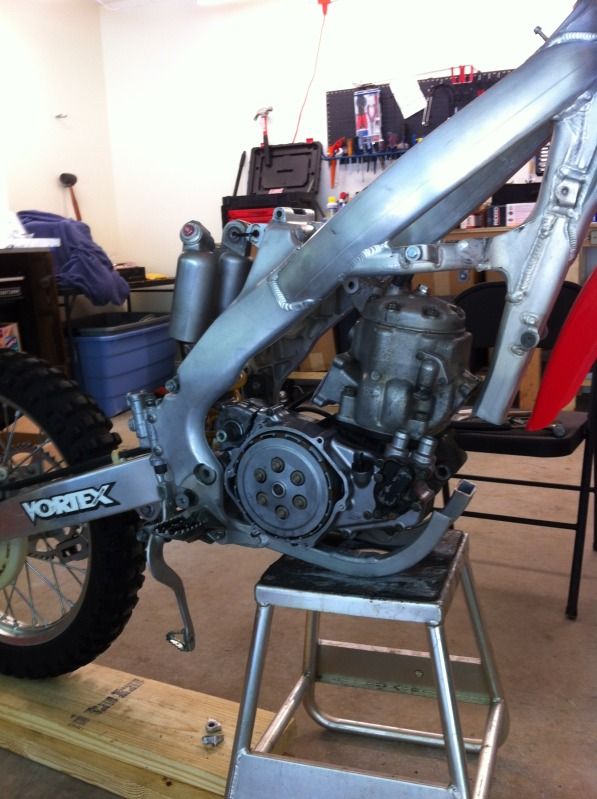
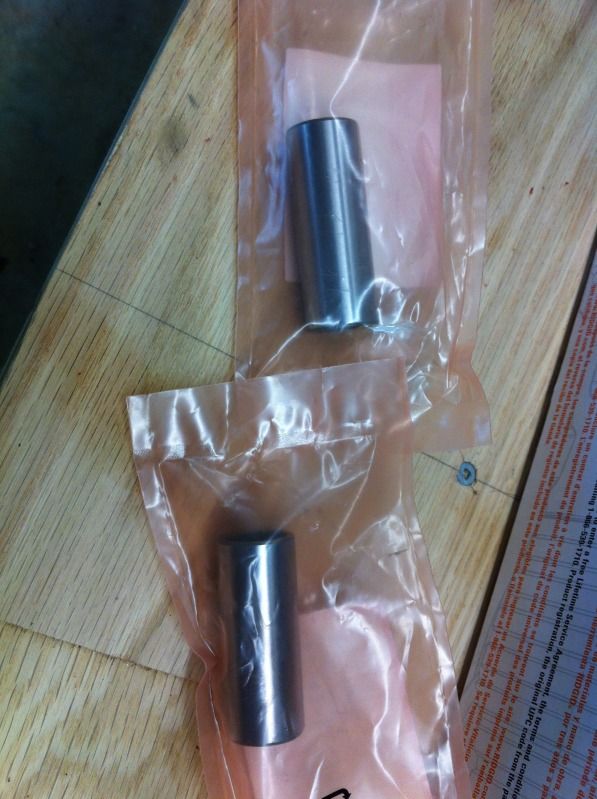
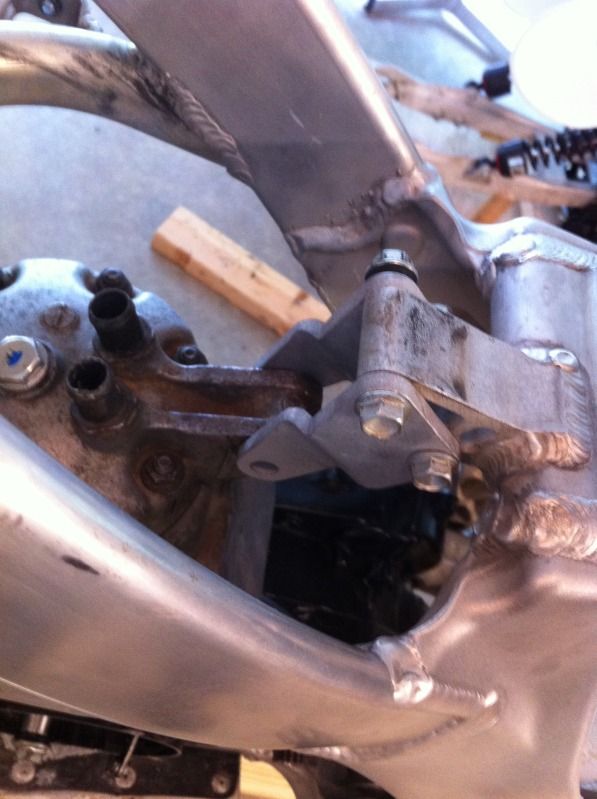
In what I consider a backwards technique, I've started a project chassis first rather than engine first.  It makes sense here, as while the engine is together I might as well mock up the frame.  In order to line the sprocket up correctly, you need to use a set of swingarm collars from a 02-07 CR125.  The shorter one is the left side, and the longer one is the right.  This lined up the engine perfectly sprocket to sprocket.

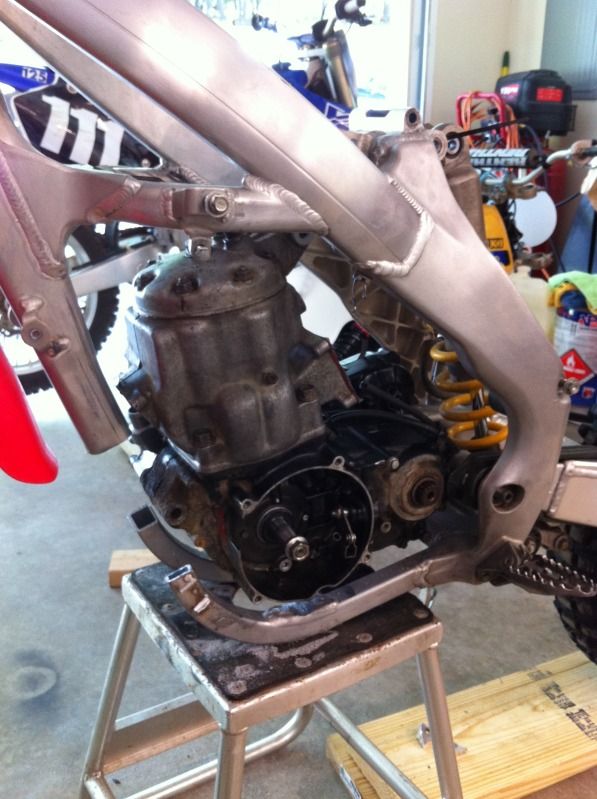
The engine in frame, with swingarm pivot bolt through:


The collars:


On the right side of the cradle, the inner clutch cover touches the frame, and needs about 2-3mm of clearance via an aluminum grinding bit on the dremel.


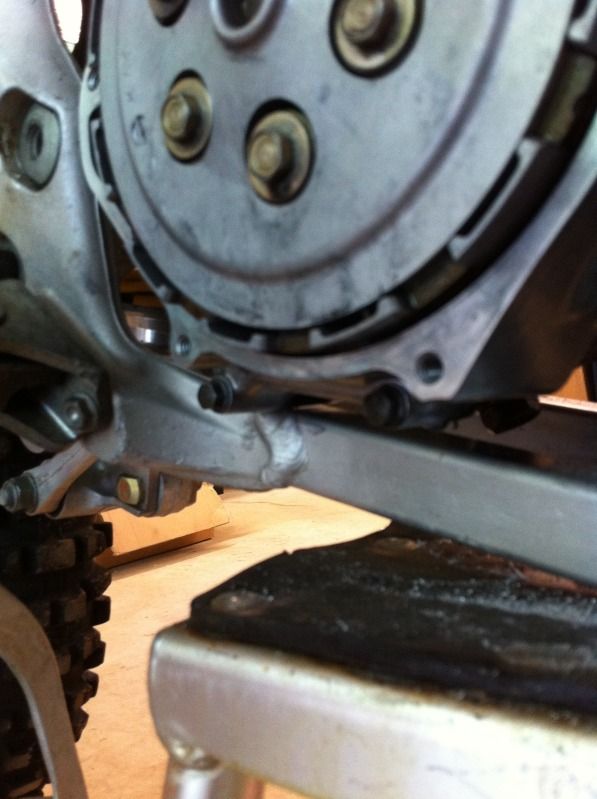
This will allow the engine to rotate into the supplied headstay:


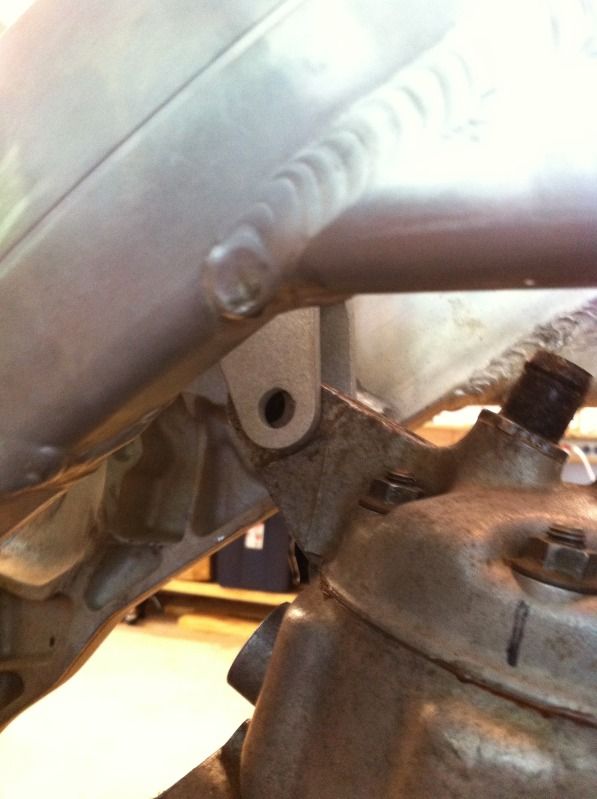
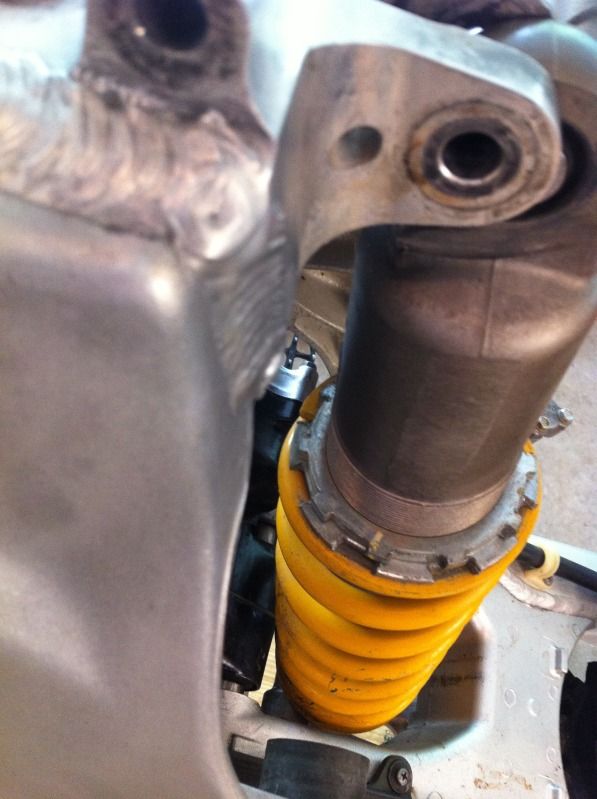
The other bit of clearance-ing needed is almost 4mm off of the rear of the cases, much like how dogger315 has done, to clear the shock spring.


Here's the tool that did it, the old Y, the new Y, and my jig I bought from a vendor on www.bannedcr500riders.com:


...and here's where I left off for the day.


So far I'd like to thank the exceptional dogger315 for providing careful advice on the CR250 clutch conversion via PM, as well as reputable shops and mods on part 1 of this build.

Once I get the mounts all fabbed up, the frame will come completely apart and will be blasted, and the only parts that will be polished are the upper extruded spars that run alongside the tank. The swingarm will be brushed.  I will also start the engine tear-down as soon as the frame will permit, as I've been stocking up parts to do it.

Right now I'm using a 2000 CR250 complete ignition; research has proven it to work quite well.  The digital ignition is a plus, but I'm not too sure if the light flywheel will be.

Stay tuned!
« Last Edit: December 31, 1969, 04:00:00 PM by ' »

Offline shanes

  • Novice
  • *
  • Posts: 1
    • View Profile
CRF Redemption: The 500 Project Part 2
« Reply #1 on: June 15, 2013, 02:11:09 AM »
keep the pics coming  8) 8) 8)
« Last Edit: December 31, 1969, 04:00:00 PM by ' »

Offline Stusmoke

  • Posts: 0
    • View Profile
CRF Redemption: The 500 Project Part 2
« Reply #2 on: June 15, 2013, 02:15:18 AM »
Talk about a clean and well done conversion! Make sure you have confidence in that welder, you don't want to find out that his welds are crap when you're 40 feet in the air.
« Last Edit: December 31, 1969, 04:00:00 PM by ' »

Offline motoxr377

  • Junior
  • **
  • Posts: 49
  • RM GUY
    • View Profile
CRF Redemption: The 500 Project Part 2
« Reply #3 on: June 15, 2013, 02:19:24 AM »
Talk about a clean and well done conversion! Make sure you have confidence in that welder, you don't want to find out that his welds are crap when you're 40 feet in the air.

He does Joe Gibbs Racing's Radiators and roughly half of the factory teams bike stands.  I'm not too worried man.
« Last Edit: December 31, 1969, 04:00:00 PM by ' »

Offline SachsGS

  • Professional
  • *****
  • Posts: 1235
    • View Profile
CRF Redemption: The 500 Project Part 2
« Reply #4 on: June 15, 2013, 03:53:24 AM »
Looking good! For the finishing work special al. grinding discs are available for angle grinders. I'd be careful about notching the frame as you don't want create "stress risers" that concentrate stress and lead to fatigue and frame failure.
« Last Edit: December 31, 1969, 04:00:00 PM by ' »

Offline citabjockey

  • Expert
  • ****
  • Posts: 145
    • View Profile
    • Yamaha Vintage Enduros
CRF Redemption: The 500 Project Part 2
« Reply #5 on: June 15, 2013, 05:34:44 AM »
So the strategy for the clutch case is to divit/hack on the frame for clearance? If so are you reinforcing the notch locations somehow to make up for the lost strength or to spread the load past the notches?
« Last Edit: December 31, 1969, 04:00:00 PM by ' »
Yamaha CT3, RT3, MX125, SC500, Toy Prius, Diesel F250 (it all balances out)

Offline TotalNZ

  • Expert
  • ****
  • Posts: 247
    • View Profile
CRF Redemption: The 500 Project Part 2
« Reply #6 on: June 15, 2013, 06:33:02 AM »
So the strategy for the clutch case is to divit/hack on the frame for clearance? If so are you reinforcing the notch locations somehow to make up for the lost strength or to spread the load past the notches?
Yeah thats what i was thinking. Do all the conversions require grinding for clearance?
« Last Edit: December 31, 1969, 04:00:00 PM by ' »

Offline TMKIWI

  • Professional
  • *****
  • Posts: 1634
    • View Profile
CRF Redemption: The 500 Project Part 2
« Reply #7 on: June 15, 2013, 08:07:44 AM »
So the strategy for the clutch case is to divit/hack on the frame for clearance? If so are you reinforcing the notch locations somehow to make up for the lost strength or to spread the load past the notches?
Yeah thats what i was thinking. Do all the conversions require grinding for clearance?

X3.

Those lower rails will not be more then 2.5-3mm thick. Any grinding there will weaken it badly.
Would it be easier to just lower the rail instead.
I am sure you know more on these conversions then me, just curious.

Rest of the build is looking good. ;D
« Last Edit: December 31, 1969, 04:00:00 PM by ' »
If you don't fall off you are not going hard enough

Offline motoxr377

  • Junior
  • **
  • Posts: 49
  • RM GUY
    • View Profile
CRF Redemption: The 500 Project Part 2
« Reply #8 on: June 15, 2013, 12:10:11 PM »
So the strategy for the clutch case is to divit/hack on the frame for clearance? If so are you reinforcing the notch locations somehow to make up for the lost strength or to spread the load past the notches?
Yeah thats what i was thinking. Do all the conversions require grinding for clearance?

X3.

Those lower rails will not be more then 2.5-3mm thick. Any grinding there will weaken it badly.
Would it be easier to just lower the rail instead.
I am sure you know more on these conversions then me, just curious.

Rest of the build is looking good. ;D

Thanks guys. I understand your concern, but I wont be touching the actual cradle rail as it is paper thin. The cover actually rests on the beefier weld that connects that rail.  This is a very common modification/concession when making these, and as long as its done right will not be a problem.
 8)
« Last Edit: December 31, 1969, 04:00:00 PM by ' »

Offline Coop

  • Global Moderator
  • Professional
  • *****
  • Posts: 2183
    • View Profile
CRF Redemption: The 500 Project Part 2
« Reply #9 on: June 15, 2013, 01:10:07 PM »
Good stuff.
« Last Edit: December 31, 1969, 04:00:00 PM by ' »
- Mike - Don't take life so seriously, nobody gets out alive.

Offline _X_

  • Professional
  • *****
  • Posts: 272
  • M.I.R.A.
    • View Profile
CRF Redemption: The 500 Project Part 2
« Reply #10 on: June 15, 2013, 06:58:39 PM »
arm rippa!
« Last Edit: December 31, 1969, 04:00:00 PM by ' »

Offline cnrcpla

  • Novice
  • *
  • Posts: 0
    • View Profile
CRF Redemption: The 500 Project Part 2
« Reply #11 on: June 15, 2013, 11:15:50 PM »
This is going to be awesome. Can't wait to see it finished
« Last Edit: December 31, 1969, 04:00:00 PM by ' »

Offline ford832

  • Professional
  • *****
  • Posts: 1532
  • I PITY THE FOOL THAT RIDES A FOURSTROKE
    • View Profile
CRF Redemption: The 500 Project Part 2
« Reply #12 on: June 15, 2013, 11:28:48 PM »
 8)
« Last Edit: December 31, 1969, 04:00:00 PM by ' »
I'd rather a full bottle in front of me than a full frontal lobotomy.

Offline scotty dog

  • Professional
  • *****
  • Posts: 599
  • because golf courses should be motocross tracks!
    • View Profile
CRF Redemption: The 500 Project Part 2
« Reply #13 on: June 16, 2013, 10:22:57 AM »
Top stuff love ya work
Just out of curiosity,  why do all the other conversions either replace the bottom rail or, like Service, most of it?
« Last Edit: December 31, 1969, 04:00:00 PM by ' »
F**K THE WHALES......................SAVE THE 2 STROKE!!!!

The hardest part about riding a 4 stroke is telling your parents your Gay!!

05 CR 250

Offline motoxr377

  • Junior
  • **
  • Posts: 49
  • RM GUY
    • View Profile
CRF Redemption: The 500 Project Part 2
« Reply #14 on: June 16, 2013, 02:28:41 PM »
Top stuff love ya work
Just out of curiosity,  why do all the other conversions either replace the bottom rail or, like Service, most of it?

Thanks guys, I was pretty nervous cutting into a frame but it turned out easy.

I believe most replace the cradle because it looks (and maybe behaves) the most like a stock setup. Mine is the most professional looking for the cost, as I'm not a metal fabricator, just a guy who knows a good welder.  ;D

I'm buying some dremel bits and an angle grinder wheel tomorrow.
« Last Edit: December 31, 1969, 04:00:00 PM by ' »