1
General Two Stroke Talk / 96-01 YZ to Modern 02 + Gas Tank Conversion
« on: July 22, 2011, 05:27:52 PM »
Its been done before, But I'd thought I'd show you mine with the dimensions.
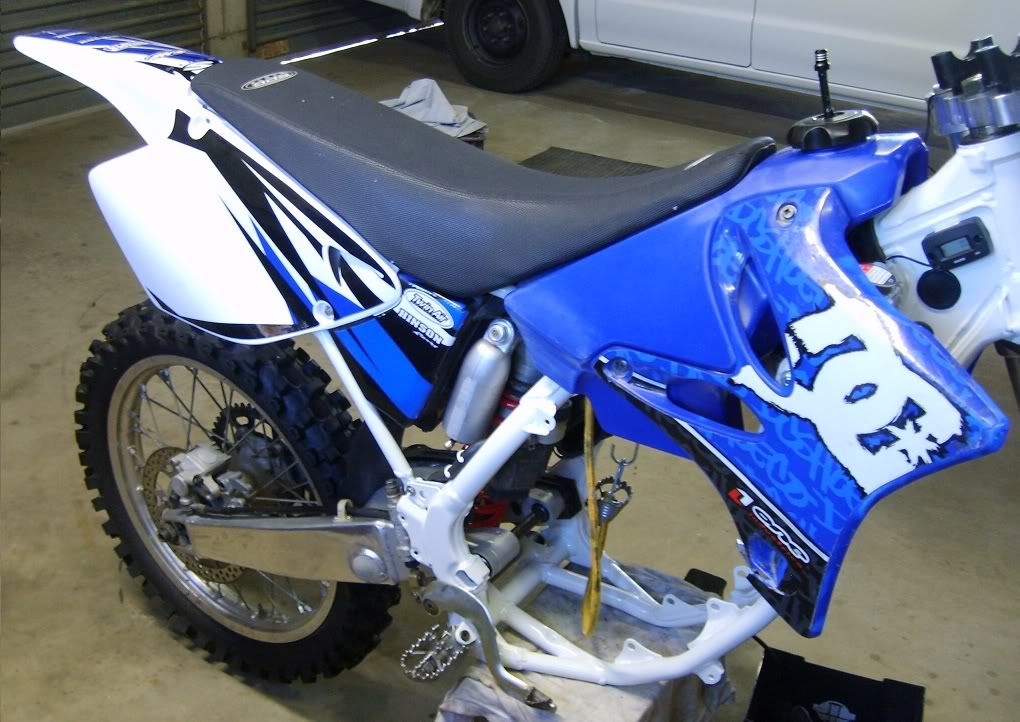
This is for a 05 tank. So it will be for the wider aluminium frame.
Tools you'll need
Box cutter
Hacksaw.
Some Hand files.
Center Punch with hammer.
Vice to hold it all
6.5mm Drill bit for the tank mounts.
Step Drill bit capable of drilling a 16mm hole for the rubber bushes.
Few beers and some good tunes.
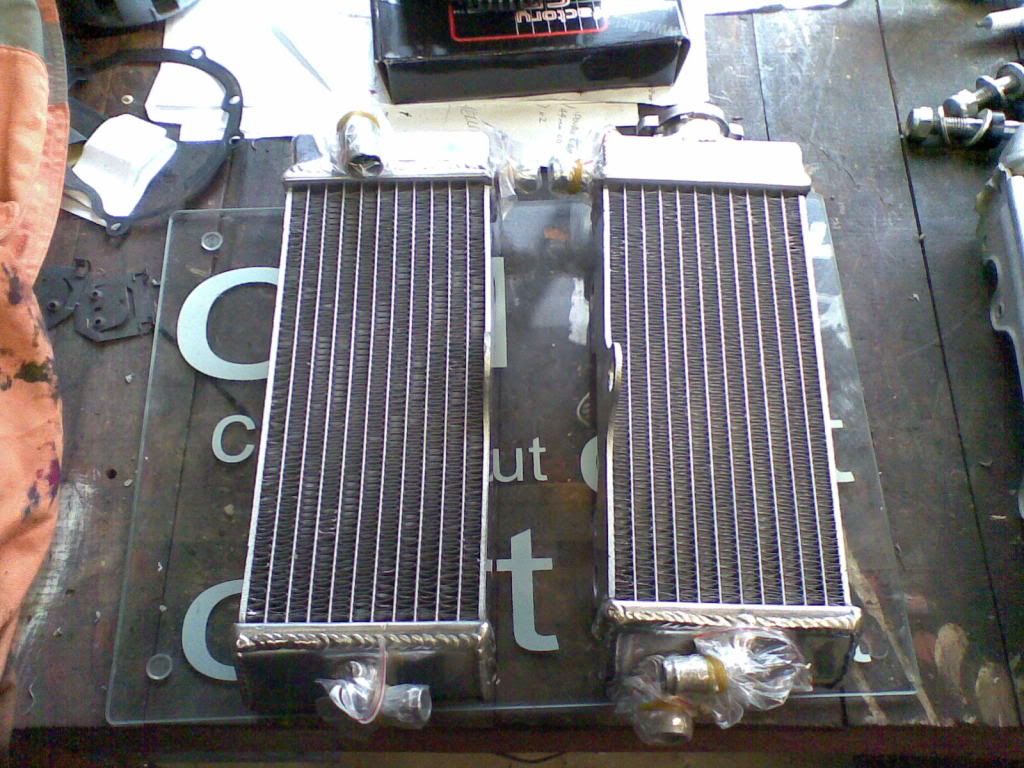
Shift the tank rubber up the frame, re-zip tie it. The lower rubber mount had to be trimmed (Razer Blade/box cutter) on the side So the tank would slide over it snug. (picture shows the radiator cages I built). Also you will need to unbolt the Plastic tab and bolt that locates the seat off your 96-01 tank and bolt it to the newer style 05 tank.

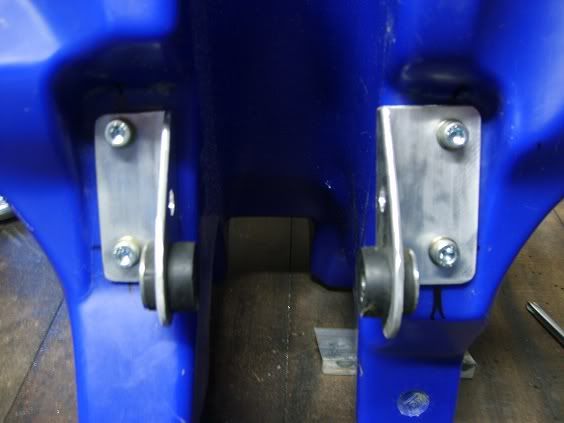
Here are the brackets I made. From 40x40 3mm Aluminium angle. The rubber bushes with washer tube inserts are the same used on the radiators. Extra holes in the middle of the bracket are just for visual.
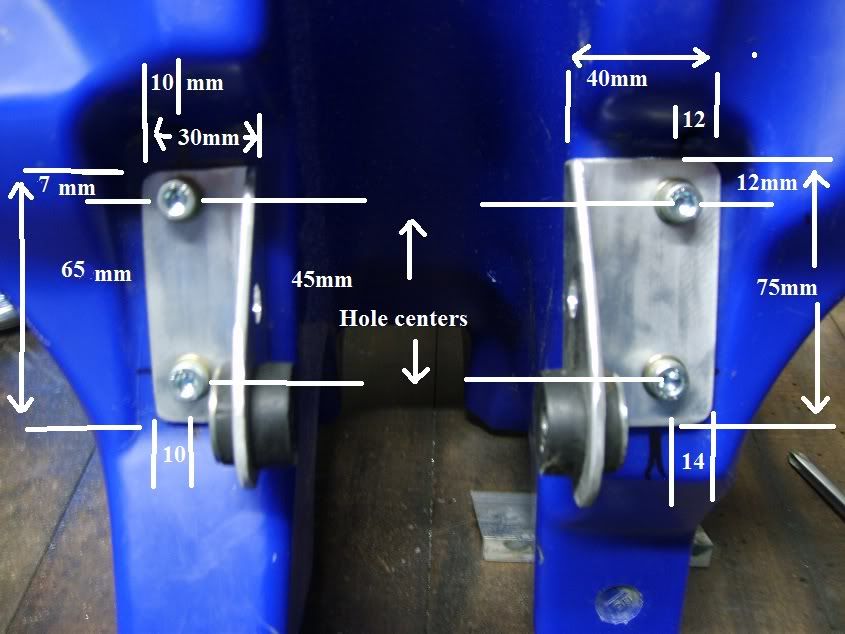
Here are the dimensions for the mounting holes for the Tank.. All measuring from the TOP leading edge downwards.
Use your 6.5mm drill bit to drill the holes
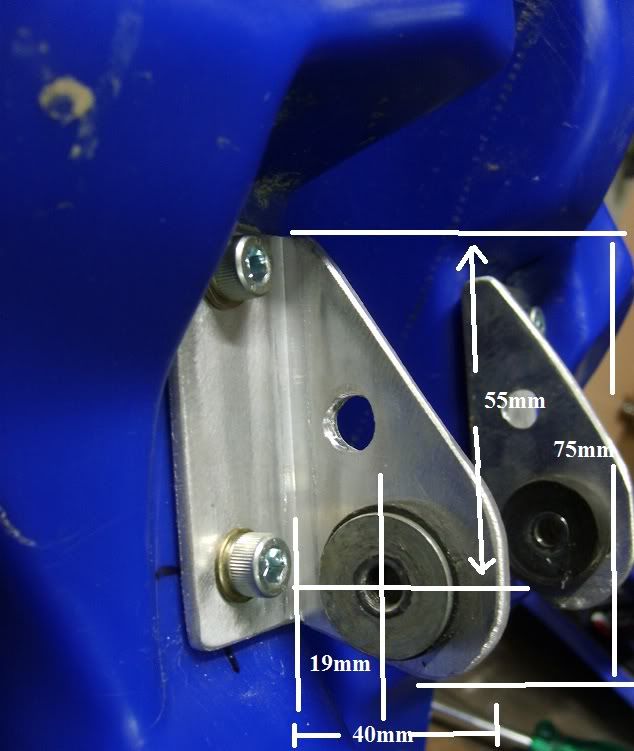
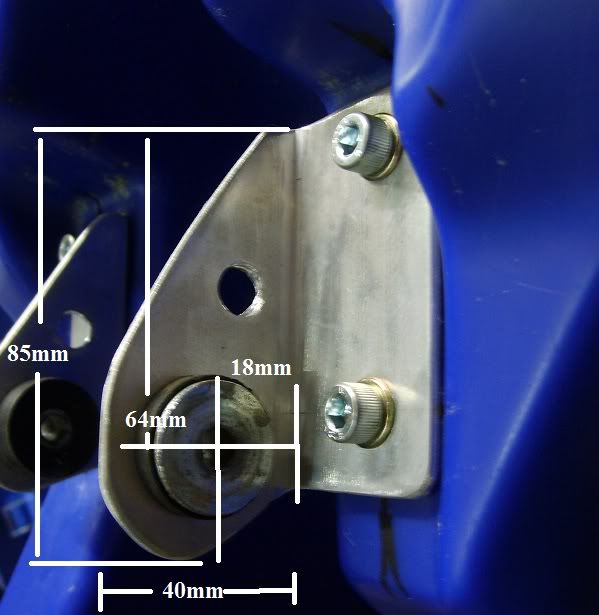
Here are the dimensions for the mounting holes for the Frame. Use your step drill at 16mm for the rubber bushes. They are bushes for the radiator mounts. I had a few spare.
Radiator Fill side (Right Side)
Gear shifter side (Left Side)
For the lower shroud brackets you can do this (Taken from another thread) 25mm hole centers apart. I'd use a bit of smaller angle for extra strength so there is a spine, stick it in the vice for the correct angle contact to shroud guard. Like the little angle shown lower on my welded mounts. Also shows another way to mount the tank using the 05 Plastic mounts on the tank.
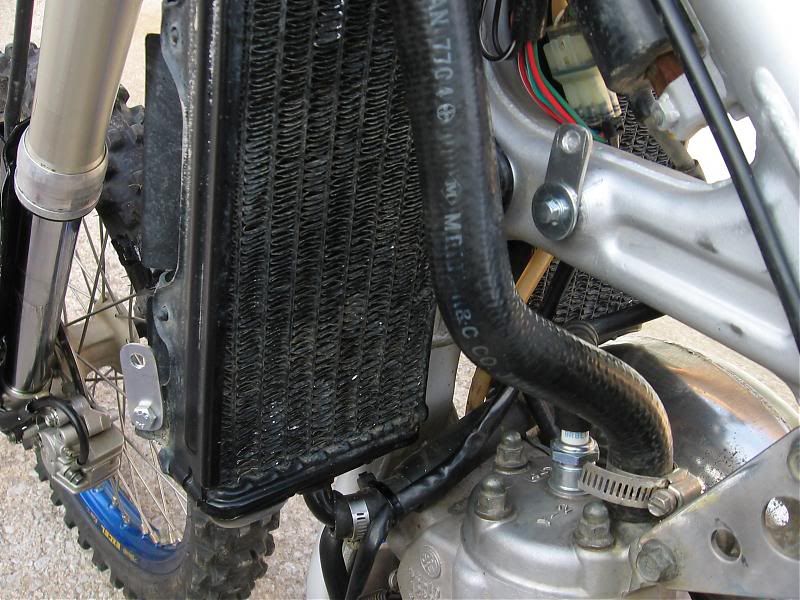
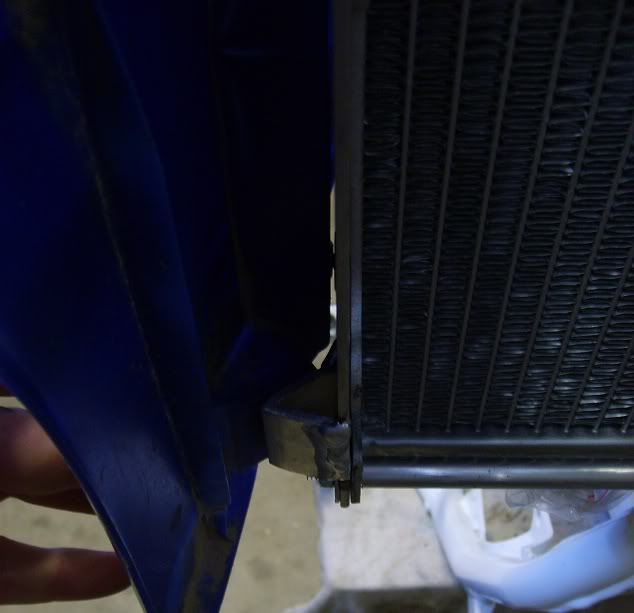
This is how I did mine. I built Radiator cages since there is much on offer for these models. But with integrated lower shroud mounts for the newer guards. 6mm side thickness and crush tubes bolted front and rear. Shouldn't be able to wreck those babies in a hurry!
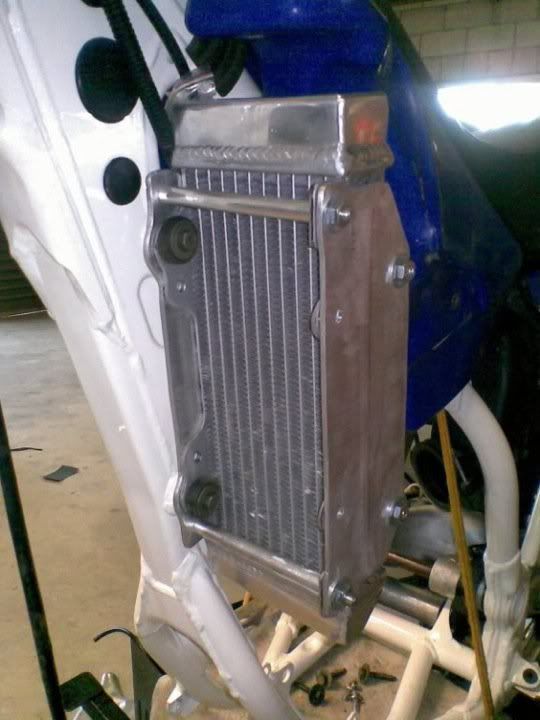
Here is my mount TIG welded on and angle inline with the guard.
I have a custom sticker kit in the works for mine. Should look sweet once its all done.
Hope this helps!! Feel free to ask any more questions.
This is for a 05 tank. So it will be for the wider aluminium frame.
Tools you'll need
Box cutter
Hacksaw.
Some Hand files.
Center Punch with hammer.
Vice to hold it all
6.5mm Drill bit for the tank mounts.
Step Drill bit capable of drilling a 16mm hole for the rubber bushes.
Few beers and some good tunes.
Shift the tank rubber up the frame, re-zip tie it. The lower rubber mount had to be trimmed (Razer Blade/box cutter) on the side So the tank would slide over it snug. (picture shows the radiator cages I built). Also you will need to unbolt the Plastic tab and bolt that locates the seat off your 96-01 tank and bolt it to the newer style 05 tank.
Here are the brackets I made. From 40x40 3mm Aluminium angle. The rubber bushes with washer tube inserts are the same used on the radiators. Extra holes in the middle of the bracket are just for visual.
Here are the dimensions for the mounting holes for the Tank.. All measuring from the TOP leading edge downwards.
Use your 6.5mm drill bit to drill the holes
Here are the dimensions for the mounting holes for the Frame. Use your step drill at 16mm for the rubber bushes. They are bushes for the radiator mounts. I had a few spare.
Radiator Fill side (Right Side)
Gear shifter side (Left Side)
For the lower shroud brackets you can do this (Taken from another thread) 25mm hole centers apart. I'd use a bit of smaller angle for extra strength so there is a spine, stick it in the vice for the correct angle contact to shroud guard. Like the little angle shown lower on my welded mounts. Also shows another way to mount the tank using the 05 Plastic mounts on the tank.
This is how I did mine. I built Radiator cages since there is much on offer for these models. But with integrated lower shroud mounts for the newer guards. 6mm side thickness and crush tubes bolted front and rear. Shouldn't be able to wreck those babies in a hurry!
Here is my mount TIG welded on and angle inline with the guard.
I have a custom sticker kit in the works for mine. Should look sweet once its all done.
Hope this helps!! Feel free to ask any more questions.